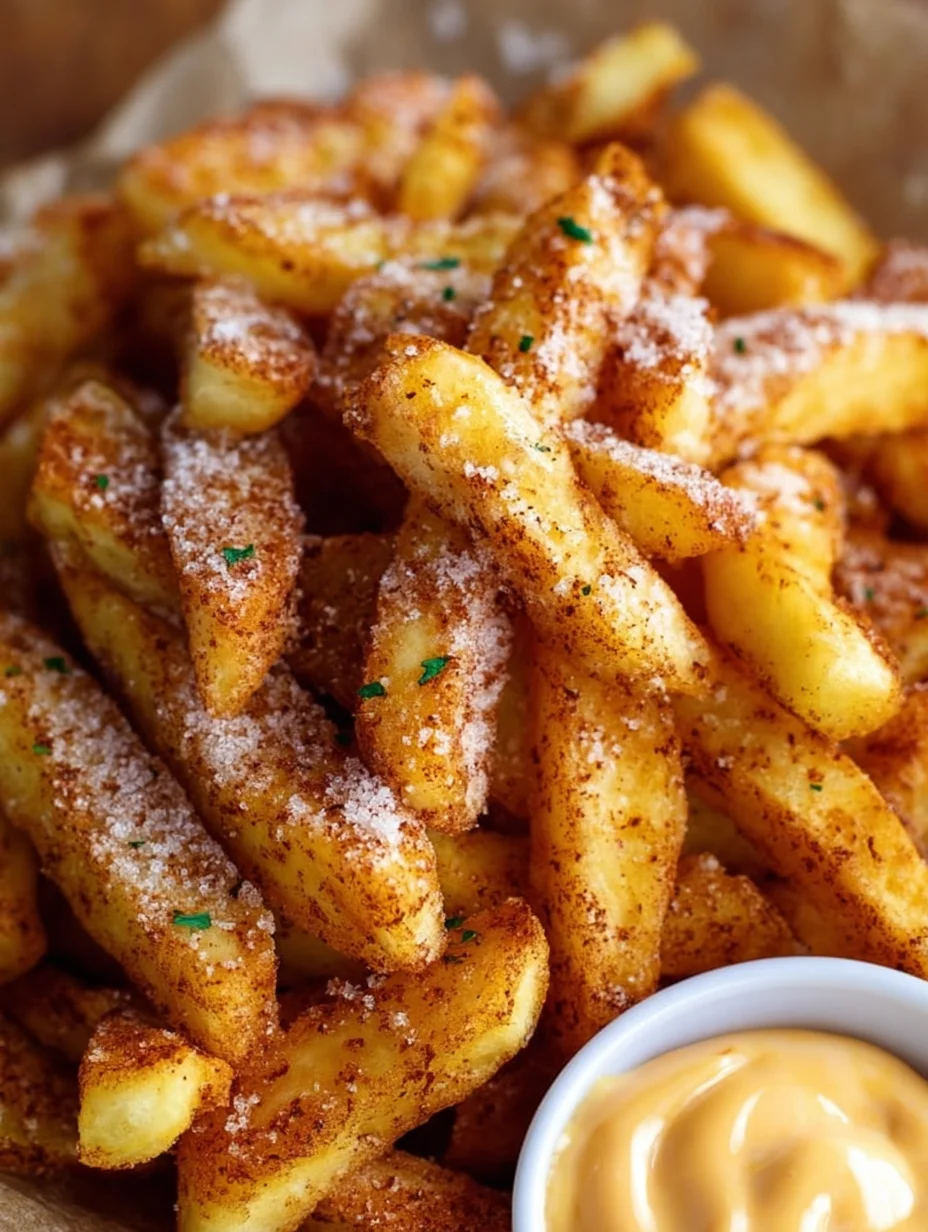
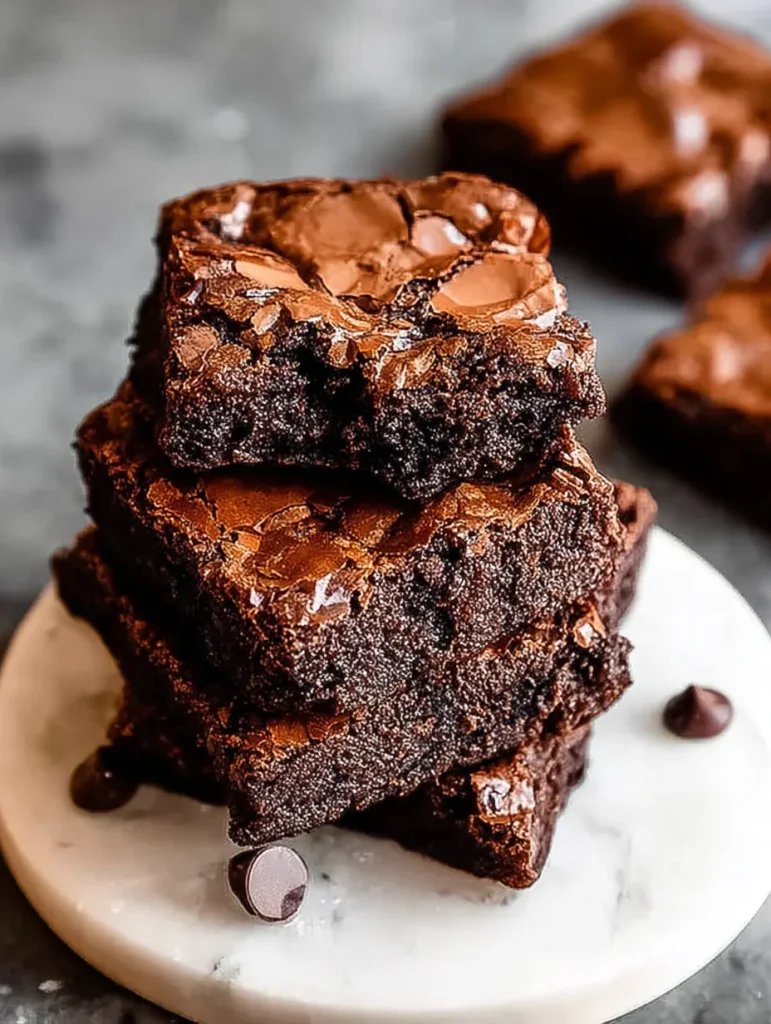
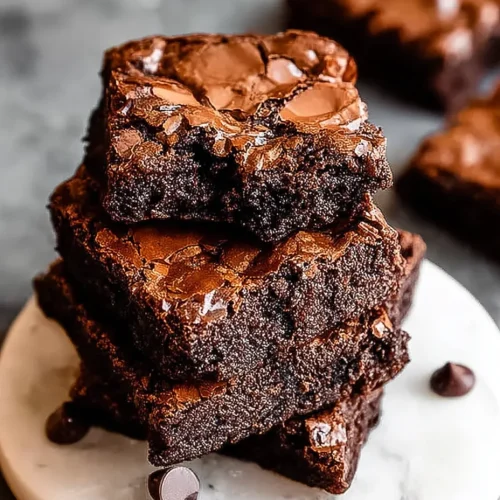
Imagine sinking your teeth into the perfect brownie – rich, intensely chocolatey, with that coveted fudgy center and delightfully chewy texture, all topped with a gorgeous shiny, crackly crust that makes your mouth water just looking at it. This isn’t just another brownie recipe; it’s your ticket to brownie perfection that will have everyone begging for the recipe. Using just one bowl and simple pantry ingredients, you’ll create bakery-quality brownies that put boxed mixes to shame while being just as easy to make.
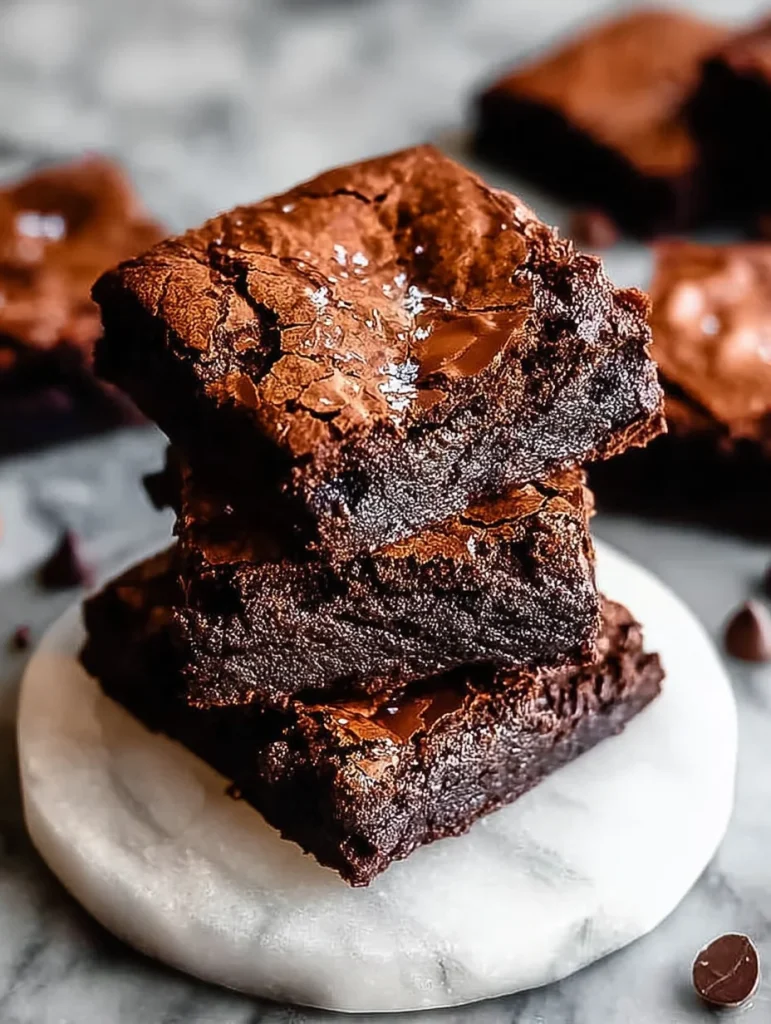
Table of contents
Why You’ll Love This Fudgy Brownie Recipe
These aren’t your average brownies – they’re the ultimate indulgent treat that delivers on every level. While boxed mixes promise convenience, this homemade version gives you superior flavor and texture without any extra fuss. The secret lies in the perfect balance of ingredients and foolproof technique that guarantees success every time.
What sets these brownies apart is their incredible texture combination: deeply fudgy and moist on the inside with just enough chewiness to satisfy, all crowned with that Instagram-worthy shiny, crackly top that bakeries charge premium prices for. The one-bowl method means minimal cleanup, and you won’t need any special equipment – no electric mixer required!
The beauty of this recipe lies in its flexibility. Want to add chopped walnuts for crunch? Go for it. Prefer dark chocolate chips over semi-sweet? Perfect. This base recipe adapts beautifully to your preferences while maintaining its signature fudgy, chewy texture that makes it absolutely irresistible. If you’re looking for more healthy treat alternatives, try our no-bake cookie dough bars or chocolate avocado mousse for equally satisfying desserts.
Essential Ingredients for Fudgy Chewy Brownies
The difference between good brownies and extraordinary brownies comes down to understanding your ingredients and how they work together to create brownie magic.
The Chocolate – Flavor & Texture Foundations
Cocoa Powder forms the chocolatey backbone of these brownies. Dutch-processed cocoa powder delivers the deepest, most intense chocolate flavor with a richer color and fudgier texture, making it the gold standard for serious brownie makers. Quality brands like Penzey’s, Guittard, Droste, or Ghirardelli will elevate your brownies significantly. Natural unsweetened cocoa powder works too, creating a slightly lighter flavor and marginally chewier texture, but the results are still delicious.
Baking Chocolate Bars can be incorporated for an even more luxurious base. Semi-sweet chocolate bars from Baker’s or Ghirardelli melt beautifully into the batter, creating velvety richness that chocolate chips simply can’t match due to their stabilizers.
Chocolate Chips are non-negotiable for achieving that coveted shiny, crinkly crust. They create pockets of melted chocolate throughout and contribute to the surface tension that forms those beautiful cracks. Semi-sweet chips are classic, but feel free to experiment with dark chocolate, milk chocolate, or even white chocolate chips for variety.
The Fats – Moisture & Richness
Melted Butter is crucial for developing the chewy texture that makes these brownies addictive. Always use unsalted butter so you can control the salt content precisely. The butter should be fully melted and slightly cooled before mixing.
Vegetable Oil is the secret weapon for extra-moist brownies that stay tender for days. Neutral oils like canola, avocado, or refined coconut oil work best. Avoid oils with strong flavors, and always check that your oil is fresh – rancid oil will ruin your brownies’ flavor.
The Sugars – Structure & Sweetness
Granulated Sugar does much more than sweeten – it’s essential for structure and that crackly top. Never reduce the sugar thinking you’re being healthier; you’ll end up with dry, crumbly brownies that stale quickly. The sugar crystals help create the surface tension needed for proper cracking.
Brown Sugar appears in some variations to add moisture and subtle molasses depth. While not always necessary, it can enhance the chewy factor and add complexity to the flavor profile.
The Eggs – Binding & Texture
The egg combination is where the magic happens. Two whole eggs plus an additional egg yolk create the perfect balance of binding, richness, and that signature chewy texture. The extra yolk adds fat and lecithin, creating a tighter, more luxurious crumb.
Cold eggs work better than room temperature ones, helping prevent doming and increasing overall moisture. The key technique is vigorous whisking – whisk those eggs for at least a full minute, or even up to three minutes according to brownie experts. This incorporation of air helps create that glossy, crackly top that makes these brownies bakery-worthy.
The Flour – Just Enough for Structure
All-Purpose Flour should be used sparingly – just enough to provide structure without making the brownies cakey. Too much flour is the fastest way to ruin fudgy brownies. Use a digital kitchen scale for precision, or carefully measure using the spoon-and-level method. Never pack flour or scoop directly with your measuring cup.
The Secret Ingredient: Cornstarch!
Here’s the game-changer that most home bakers don’t know about: cornstarch. This miracle ingredient mimics the texture enhancers found in boxed mixes, creating thicker, chewier brownies with an incredibly shiny crust. Don’t even think about skipping it – this small addition makes an enormous difference in the final texture.
Leavening Agents (or lack thereof) – Fudgy vs. Cakey
For truly fudgy, dense brownies, avoid baking soda and baking powder entirely. These leavening agents create lift and air bubbles that result in cakey texture – the opposite of what we want. Some recipes include tiny amounts for slight lift, but for maximum fudginess, leave them out completely.
Flavor Enhancers – The Finishing Touches
Vanilla Extract is absolutely essential for enhancing the chocolate flavor and adding depth. Use pure vanilla extract or bourbon vanilla for the best results. This isn’t optional – vanilla makes chocolate taste more chocolatey.
Salt balances sweetness and enhances all the other flavors. Use fine sea salt in the batter, and consider sprinkling flaky sea salt on top before baking for a gourmet bakery finish.
Espresso Powder is an optional but highly recommended addition that amplifies the chocolate flavor without making the brownies taste like coffee. Just a teaspoon transforms good brownies into extraordinary ones.
Step-by-Step Instructions for Perfect Brownies
Preheat Oven and Prepare Pan
Preheat your oven to 350°F. This temperature provides the perfect balance of cooking the interior while developing that crackly top.
Use an 8×8 or 9×9-inch light-colored metal baking pan for best results. This is crucial – glass or ceramic pans conduct heat differently, often resulting in gummy centers, collapsed tops, or overcooked edges. Metal pans provide even heat distribution and proper browning.
Line your pan with parchment paper, leaving some overhang for easy removal, and spray lightly with non-stick cooking spray.
Mixing the Batter (The One-Bowl Method)
Start by melting your butter in a large mixing bowl. You can do this in the microwave in 30-second intervals or over gentle heat on the stovetop. Let it cool slightly.
Add your sugar to the melted butter and whisk until combined. The mixture should be warm but not hot.
Now comes the crucial step: add your eggs and egg yolk, then whisk vigorously for at least one full minute. This vigorous whisking is what creates the glossy surface and crackly top. The mixture should become lighter in color and slightly thick.
Whisk in the vanilla extract and oil until fully combined.
Add your cocoa powder and whisk until smooth. The mixture will be thick and glossy.
Gently fold in the flour and cornstarch using a rubber spatula, mixing just until no dry streaks remain. Don’t overmix – this develops gluten and creates tough, cakey brownies.
Finally, fold in your chocolate chips until evenly distributed. The batter should be thick but spreadable.
Baking for Fudgy Perfection
Spread the batter evenly in your prepared pan – it will be thick, so use your spatula to smooth it into corners.
Bake for 28-35 minutes, until the top is set and has a shiny, crackly appearance. The center should still have a slight jiggle when you gently shake the pan. A toothpick inserted in the center should come out with moist crumbs, not wet batter, but not completely clean either.
Do not overbake – this is the most common mistake that results in dry, hard brownies instead of fudgy perfection.
Cooling and Serving
This is perhaps the hardest part: you must let these brownies cool completely in the pan on a wire rack before cutting. This takes at least 2 hours, but it’s essential for proper texture development and clean cuts.
The serving temperature affects texture dramatically. Serve them warm for gooey decadence, at room temperature for perfect chewiness, or chilled from the refrigerator for maximum fudginess.
Tips for Troubleshooting and Achieving the Best Brownies
Common Brownie Problems (and their fixes)
Dry or Cakey Brownies usually result from too much flour, overmixing the batter, insufficient fat, reducing the sugar, or overbaking. Measure ingredients carefully and mix just until combined.
Gummy or Collapsed Brownies often happen when using glass pans or not cooling completely. Stick with metal pans and be patient during cooling.
No Shiny Crackly Top typically means insufficient egg whisking, not enough sugar, missing chocolate chips, or not incorporating the sugar properly into the melted fat mixture. Whisk those eggs vigorously!
Batter Too Stiff or Butter Separating usually indicates measurement errors. Double-check your ingredient amounts and make sure your butter isn’t too hot when adding other ingredients.
Flat Flavor almost always means you skipped the vanilla extract. Don’t skip it!
Customization and Variations
Add-Ins that work beautifully include chopped walnuts, pecans, or hazelnuts for crunch and richness. Add about ½ cup to the batter with the chocolate chips. For more protein-packed treats, explore our [peanut butter protein cookies](https://www.healtylife.net/peanut butter-protein-cookies/) or rice krispies energy balls.
Different Chocolate Options can completely change your brownies’ personality. Try dark chocolate chips for intensity, milk chocolate for sweetness, or white chocolate for contrast. Looking for more creative dessert ideas? Check out our 3-ingredient banana donut holes or healthy air fryer churro bites for simple yet delicious treats.
Sugar Substitutions like using brown sugar instead of some granulated sugar will add moisture and molasses flavor, making the brownies even chewier.
Flavor Boosters like that teaspoon of espresso powder will make the chocolate flavor more intense and complex.
Toppings can take these brownies over the top. Try chocolate buttercream frosting, salted caramel sauce, chocolate ganache, or simply a dusting of powdered sugar. For more healthy dessert inspiration, check out our protein chocolate brownie recipe that delivers similar rich flavor with added nutrition.
Pan Size Adjustments
Doubling the Recipe is perfect for crowds. Double all ingredients and use a 9×13-inch light-colored metal pan. Add 5-10 minutes to the baking time, but watch carefully.
Smaller Pans like an 8×8-inch instead of 9×9-inch will give you thicker brownies that need a few extra minutes of baking time.
Storage and Freezing Your Brownies
Store your cooled brownies in an airtight container at room temperature for up to 5 days. They’ll actually improve after the first day as flavors meld together.
Refrigerated brownies become even more fudgy and will keep for up to a week. Let them come to room temperature before serving for best texture.
For freezing, cool completely, wrap tightly in plastic wrap, then place in an airtight freezer bag or container. They’ll keep for up to 3 months. Thaw at room temperature for several hours or overnight.
If you’re interested in more make-ahead treats, our carrot cake oatmeal cookies and blueberry cheesecake protein bites are perfect for meal prep and healthy snacking.
Fudgy Chewy Brownies (with Crackly Tops)
Equipment
- 8×8 or 9×9-inch light-colored metal baking pan
- Large mixing bowl
- Wire whisk
- Rubber spatula
- Measuring cups and spoons
- Parchment paper
Ingredients
- 1/2 cup 113g unsalted butter
- 1 cup 200g granulated sugar
- 2 large eggs
- 1 large egg yolk
- 1 teaspoon pure vanilla extract
- 1/4 cup vegetable oil
- 3/4 cup 75g unsweetened cocoa powder
- 1/2 cup 60g all-purpose flour
- 2 tablespoons cornstarch
- 1/2 teaspoon fine sea salt
- 1 teaspoon espresso powder optional
- 3/4 cup semi-sweet chocolate chips
Instructions
- Prepare: Preheat oven to 350°F (175°C). Line an 8×8 or 9×9-inch light-colored metal baking pan with parchment paper and spray with non-stick cooking spray.
- Melt butter: In a large mixing bowl, melt the butter. Let cool slightly until warm but not hot.
- Add sugar: Whisk the granulated sugar into the melted butter until combined.
- Whisk eggs: Add eggs and egg yolk to the butter mixture. Whisk vigorously for at least 1 full minute until the mixture becomes lighter in color and slightly thick.
- Add wet ingredients: Whisk in vanilla extract and vegetable oil until fully combined.
- Add cocoa: Add cocoa powder and whisk until smooth and glossy.
- Fold dry ingredients: Using a rubber spatula, gently fold in flour, cornstarch, salt, and espresso powder (if using) until just combined. Don’t overmix.
- Add chocolate chips: Fold in chocolate chips until evenly distributed.
- Bake: Spread batter evenly in prepared pan. Bake for 28-35 minutes until top is set with a shiny, crackly appearance and center has a slight jiggle.
- Cool: Cool completely in pan on wire rack for at least 2 hours before cutting.
Notes
- Use light-colored metal pans only – glass or ceramic pans will result in gummy texture
- Don’t skip the vigorous egg whisking – this creates the crackly top
- Cornstarch is essential for the perfect chewy texture
- Cool completely before cutting for clean slices and best texture
- Store in airtight container at room temperature up to 5 days
- Can be frozen up to 3 months when properly wrapped
Frequently Asked Questions (FAQ)
While technically possible, it’s not recommended for best results. Glass pans can lead to gummy, collapsed, or dry-edged brownies and often require longer baking times due to uneven heat distribution.
Dutch-processed cocoa powder is often recommended for a deeper chocolate flavor and fudgier texture, but natural unsweetened cocoa powder will also work beautifully.
No, this is a one-bowl recipe that does not require an electric mixer. A whisk and rubber spatula are all you need.
Key techniques include whisking the eggs vigorously (especially with the sugar and melted fat), ensuring chocolate chips are included, and combining ingredients while the butter mixture is still warm.
It’s not recommended to skip the chocolate chips entirely, as they’re key to achieving the desired shiny, crinkly crust and contribute significantly to the overall texture and sweetness.
Yes, you can double all ingredients and bake in a 9×13-inch light-colored metal baking pan, adding 5-10 minutes to the baking time.
Cakey brownies often result from too much flour, inclusion of leavening agents like baking soda or powder, and overmixing the batter. For fudgy and chewy brownies, use minimal flour, no leavening agents, and careful mixing.
Unfrosted brownies can be stored in an airtight container at room temperature for 3-5 days, refrigerated for up to a week, or frozen for up to 3 months.
While not essential for structure, vanilla extract is highly recommended as it significantly enhances and deepens the chocolate flavor. Without it, the brownies may taste flat.
Ready to create brownie perfection? This recipe delivers everything you want in a brownie – that perfect fudgy, chewy texture with a gorgeous crackly top that looks as good as it tastes. Once you master this technique, you’ll never go back to boxed mixes again.
For more delicious homemade treats and healthy recipe inspiration, explore our collection of protein-packed desserts and easy baked goods that satisfy your sweet tooth while supporting your wellness goals.