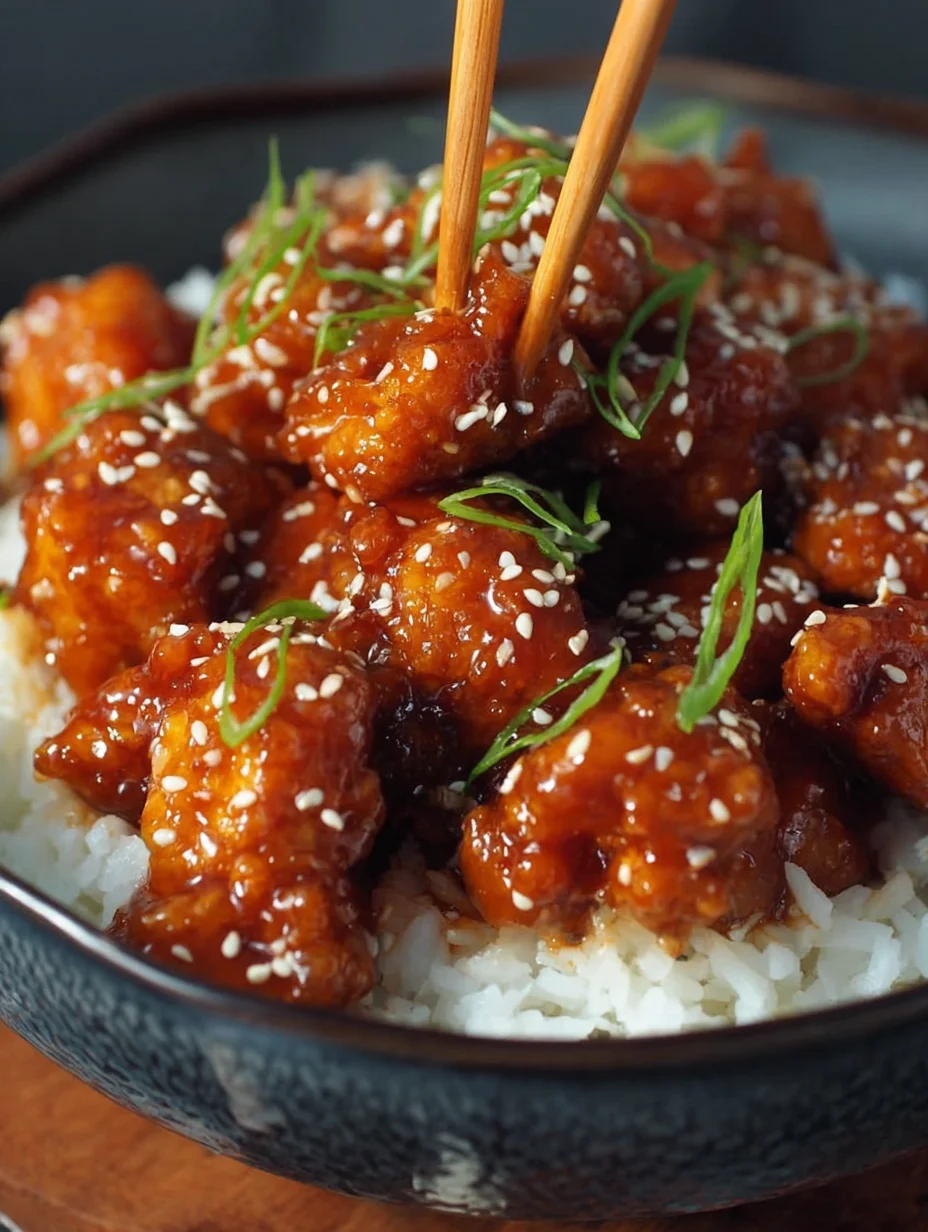
Craving that perfect balance of sweet and savory in a weeknight dinner? This irresistible Honey Garlic Chicken delivers restaurant-quality flavor in just 15 minutes using only 5 pantry staples! With its glossy, sticky sauce that clings to every bite of tender chicken, this homemade fakeaway beats takeout every time. Whether you’re feeding hungry kids or impressing dinner guests, this foolproof recipe transforms simple ingredients into a family favorite that’ll have everyone asking for seconds. The magic lies in the perfectly balanced sauce that’s naturally sweetened with honey and brings together umami-rich soy sauce, tangy rice vinegar, and aromatic garlic for an addictive flavor combination you’ll want to make again and again.
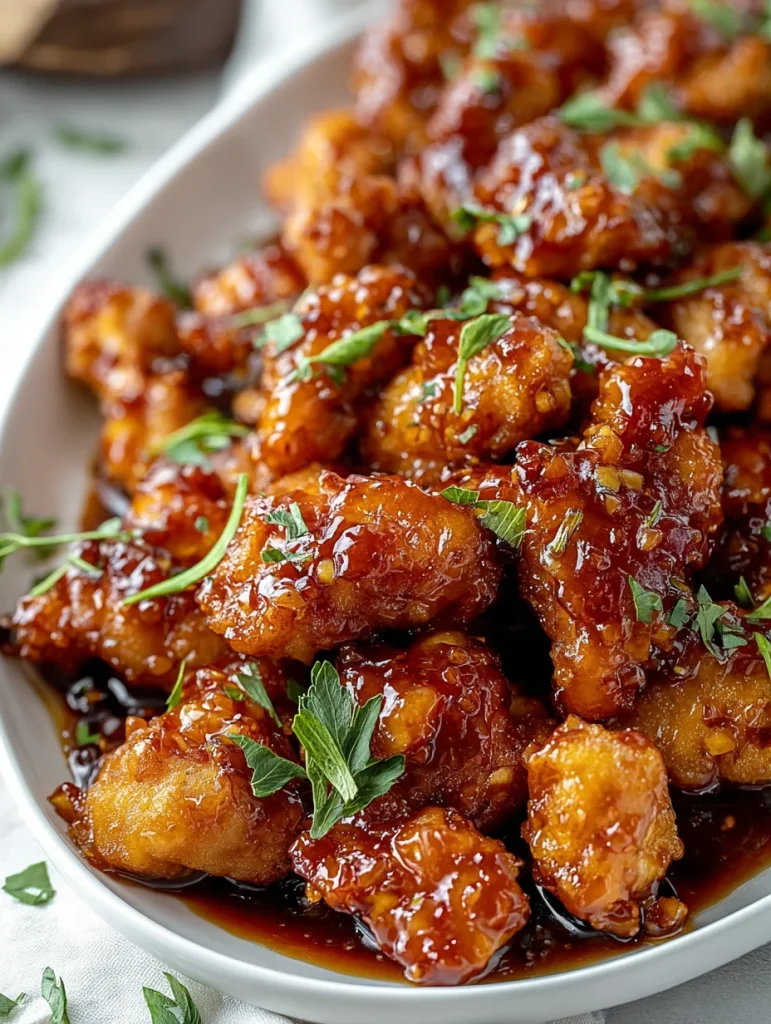
Table of contents
- Why You’ll Love This Honey Garlic Chicken Recipe
- What You’ll Need: Ingredients for Honey Garlic Chicken
- Step-by-Step: How to Make Honey Garlic Chicken
- Top Tips for the Best Honey Garlic Chicken Every Time
- Honey Garlic Chicken Variations: Beyond Chicken Breast!
- What to Serve With Honey Garlic Chicken
- Make-Ahead, Storage & Reheating Tips (Meal Prep Friendly!)
- Frequently Asked Questions (FAQs)
Why You’ll Love This Honey Garlic Chicken Recipe
This isn’t just another chicken recipe – it’s your new go-to solution for busy evenings when you want something special without the stress.
Lightning Fast – Ready in Under 20 Minutes!
With just 5 minutes of prep time and 15 minutes of cooking, this recipe fits perfectly into hectic schedules. The key is having everything ready before you start cooking – once that pan heats up, dinner comes together incredibly quickly. Perfect for those nights when you walk through the door wondering what’s for dinner, this recipe transforms basic ingredients into something extraordinary faster than you could order takeout.
Simple Ingredients, Incredible Flavor
The magic happens with just five sauce ingredients that you likely already have in your pantry. This “magic 5-ingredient sauce” creates layers of complex flavor that taste like hours of work but require zero culinary expertise. Honey provides natural sweetness and creates that signature sticky glaze, while soy sauce adds savory depth and helps tenderize the chicken. Rice vinegar brings a crucial tangy balance that prevents the dish from being overly sweet, and a touch of sriracha adds warmth without overwhelming heat. Finally, cornstarch works behind the scenes to thicken everything into a glossy coating that clings beautifully to each piece of chicken.
Healthier & Better Than Takeout
Skip the heavy breading and mysterious ingredients found in restaurant versions. This homemade alternative gives you complete control over every component – adjust the sweetness, reduce the sodium by choosing low-sodium soy sauce, or amp up the heat to your family’s preference. The chicken is lightly coated in flour for texture rather than heavily breaded, making it a lighter option that still delivers on satisfaction. Plus, you’re using real honey instead of corn syrup, and fresh garlic instead of powdered seasonings. If you love flavorful chicken dishes, you’ll also enjoy our Bang Bang Chicken Recipe and Black Pepper Chicken.
Highly Versatile for Any Protein
While this recipe shines with chicken, the incredible sauce works magic on virtually any protein. Swap in chicken thighs for budget-friendly tenderness, use large shrimp for an elegant 10-minute dinner, or try firm tofu slices for a vegetarian version that’s equally addictive. The sauce even transforms inexpensive cuts of pork or beef into something special, making it your secret weapon for elevating any protein in your fridge. For more protein-packed meals, check out our Honey Sriracha Salmon Bowl and Kung Pao Beef.
What You’ll Need: Ingredients for Honey Garlic Chicken
The beauty of this recipe lies in its simplicity – most ingredients are pantry staples you probably already have on hand.
For the Irresistible Honey Garlic Sauce
Honey (1/3 cup): The star ingredient that provides natural sweetness and creates that signature sticky glaze when it reduces. Use pure honey for the best flavor – lighter varieties like clover work perfectly.
Soy Sauce (1/4 cup): Adds essential umami depth and helps tenderize the chicken. Low-sodium soy sauce is recommended to control saltiness, and tamari works perfectly for gluten-free needs without compromising flavor.
Rice Vinegar (2 tablespoons): This crucial ingredient prevents the dish from being cloying by adding bright, tangy contrast. If unavailable, substitute with apple cider vinegar or white wine vinegar plus a pinch of sugar.
Sriracha Sauce (1 tablespoon): Provides gentle warmth rather than fire – most people find this amount barely detectable, but it adds complexity. Easily customizable based on your heat preference.
Toasted Sesame Oil (1 teaspoon): A little goes a long way in adding nutty, aromatic depth. Regular sesame oil can be substituted but use sparingly as it’s stronger in flavor.
Cornstarch (1 tablespoon): The secret to achieving that glossy, restaurant-style coating. It thickens the sauce and helps it cling to every surface of the chicken.
For the Tender Chicken Morsels
Boneless, Skinless Chicken (2 large breasts, about 1 pound): Cut into bite-sized pieces for quick, even cooking. Chicken thighs work beautifully too and are more budget-friendly while being virtually impossible to overcook.
All-Purpose Flour (1/3 cup): Creates a light coating that promotes browning and gives the sauce something to grab onto. This isn’t heavy breading – just enough to create texture.
Salt and Black Pepper: Essential for seasoning the chicken before cooking. Don’t skip this step as it builds flavor from the inside out.
Garlic Powder (1 teaspoon): Provides additional garlic flavor that won’t burn during the high-heat cooking process.
Other Kitchen Essentials
Cooking Oil (2 tablespoons): Choose a neutral oil with a high smoke point like vegetable, canola, or avocado oil. Olive oil works but may smoke at higher temperatures.
Unsalted Butter (2 tablespoons): Added at the end for richness and to help create an even silkier sauce.
Fresh Garlic Cloves (4 cloves, minced): Provides aromatic punch that dried garlic can’t match. Mince finely so it cooks evenly and quickly.
Green Onions (3-4 stalks): For fresh color and mild onion flavor that brightens the rich sauce. Both white and green parts can be used.
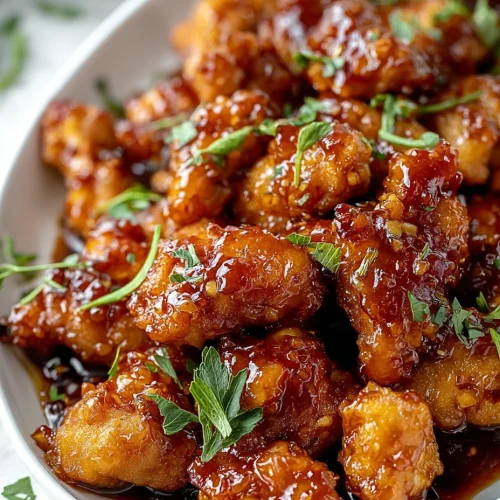
Optional Garnishes: Toasted sesame seeds, red pepper flakes, fresh cilantro, or chopped parsley add visual appeal and extra flavor layers.
Step-by-Step: How to Make Honey Garlic Chicken
Success with this recipe depends on preparation and timing – once you start cooking, everything happens quickly!
Prepare the Sauce (Our Top Tip!)
Before touching the chicken or heating the pan, whisk together honey, soy sauce, rice vinegar, sriracha, sesame oil, and cornstarch in a bowl until smooth. Set aside where you can easily reach it. This crucial step ensures you won’t be scrambling to mix sauce while chicken is cooking, preventing overcooking and ensuring even coating. The cornstarch may settle, so give it a quick stir before adding to the pan.
Season & Flour Coat the Chicken
Cut chicken into uniform 1-inch pieces for even cooking – this size cooks through quickly while staying juicy. Pat pieces dry with paper towels, then season generously with salt, pepper, and garlic powder. Toss seasoned chicken with flour in a bowl until evenly coated. This light dusting creates a golden crust and provides texture for the sauce to cling to without making the dish heavy.
Sear the Chicken to Golden Perfection
Heat oil in a large skillet or wok over medium-high heat until shimmering. Here’s the key: cook chicken in batches to avoid overcrowding the pan, which creates steam instead of browning. Add half the chicken pieces, leaving space between each piece. Cook without moving for 2-3 minutes until golden brown on the bottom, then flip and cook another 2-3 minutes until cooked through and golden on all sides. Remove to a plate and repeat with remaining chicken. This technique ensures every piece gets properly browned and develops maximum flavor.
Create the Aromatic Base & Add the Sauce
Reduce heat to medium-low and add butter to the same pan. Once melted, add minced garlic and sauté for 30-60 seconds until fragrant but not browned – burned garlic will make the dish bitter. Immediately pour in your prepared sauce mixture, scraping up any browned bits from the bottom of the pan with a wooden spoon. These fond bits add incredible depth to the final dish.
Simmer & Coat for That Signature Stickiness
Let the sauce simmer for 1-2 minutes, stirring constantly as the cornstarch activates and the mixture thickens to a glossy glaze. You’ll see it transform from thin liquid to a coating that coats the back of a spoon. Return the cooked chicken to the pan and toss gently until every piece is evenly coated in the sticky sauce. The residual heat will warm the chicken through without overcooking it.
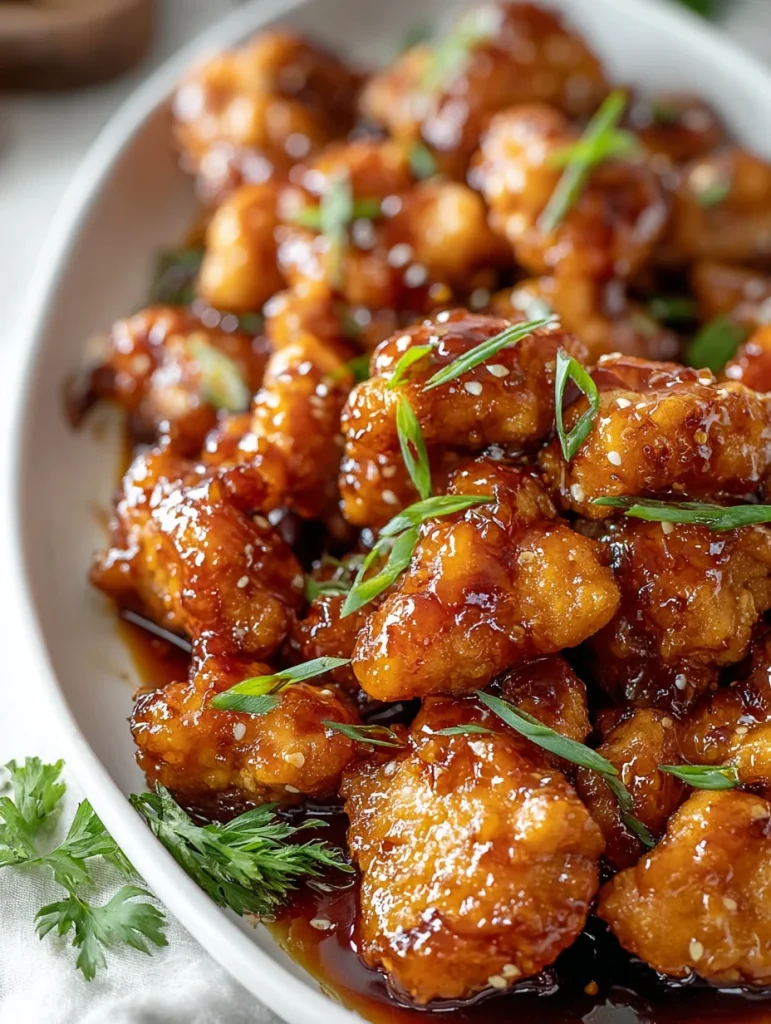
Final Touch & Serve!
Remove from heat immediately once chicken is coated – the sauce will continue to thicken slightly as it cools. Sprinkle with sliced green onions and any other desired garnishes. Serve immediately while the sauce is at its glossiest and the chicken is at its most tender. The entire cooking process should take no more than 15 minutes once you start.
Top Tips for the Best Honey Garlic Chicken Every Time
These expert tips ensure perfect results and help you avoid common pitfalls that can turn this simple recipe into a disappointment.
Don’t Overcook Your Chicken!
Small pieces of chicken cook incredibly quickly – usually 2-3 minutes per side is sufficient. Chicken breast can go from perfectly juicy to dry and tough in just one extra minute. Chicken thighs are more forgiving due to their higher fat content, but still watch carefully. If using a meat thermometer, aim for 165°F internal temperature. The residual heat from being tossed in the hot sauce will finish cooking any slightly underdone pieces.
Mastering the Sauce Consistency
The perfect sauce should coat the chicken like a glaze without being gloopy or thin. If your sauce seems too thick, whisk in a tablespoon of water or chicken stock. If it’s too thin, simmer for an additional 30-60 seconds while stirring constantly. Be careful not to cook the sauce too long or at too high heat, as honey can burn quickly and create bitter flavors. The sauce will thicken more as it cools, so aim for slightly thinner than your desired final consistency.
Customize Your Spice & Flavor
Start with the recommended amount of sriracha and adjust from there – you can always add more heat but can’t take it away. For extra depth, add a teaspoon of freshly grated ginger along with the garlic. Some cooks like to add a pinch of red pepper flakes for visible heat, or a splash of mirin for extra sweetness. Remember that the sauce ingredients can be doubled if you want extra for drizzling over rice or vegetables.
Budget-Friendly Chicken Choices
Boneless, skinless chicken thighs are often half the price of breasts and actually work better in this recipe due to their higher fat content and more forgiving cooking characteristics. They stay moist even if slightly overcooked and have more flavor than breasts. When chicken thighs go on sale, buy extra and freeze them in meal-sized portions. The dark meat also pairs beautifully with the rich, savory-sweet sauce.
Honey Garlic Chicken Variations: Beyond Chicken Breast!
The versatility of this honey garlic sauce makes it perfect for transforming any protein into a restaurant-worthy dish.
Using Chicken Thighs
Chicken thighs are actually the superior choice for this recipe. They contain more intramuscular fat, making them incredibly forgiving and nearly impossible to overcook. Remove any excess skin and visible fat before cutting, but don’t worry about getting every bit – some fat adds flavor. Cut into similar-sized pieces as you would breasts and follow the same cooking method. Thighs may take an additional minute per side but will reward you with incredibly juicy, flavorful results.
Honey Garlic Shrimp (Prawns)
Large shrimp transform this into an elegant meal in under 10 minutes. Use 1 pound of large shrimp (21-25 count), peeled and deveined. Pat completely dry and season lightly with salt and pepper. Skip the flour coating and cook shrimp for just 1 minute per side until pink and curled. Remove shrimp, make the sauce as directed, then return shrimp for just 30 seconds to coat. Overcooking shrimp makes them rubbery, so watch carefully. For another delicious shrimp dish, try our Honey Garlic Shrimp Bowls or Spicy Shrimp Tacos.
Honey Garlic Tofu “Steaks” (Vegetarian Option)
Extra-firm tofu works best for this preparation. Drain well and slice into 1/2-inch thick rectangles, then cut into bite-sized pieces. Press between paper towels and weight down for 15 minutes to remove excess moisture. Coat lightly in cornstarch instead of flour for extra crispiness. Pan-fry until golden and crispy on all sides before tossing with sauce. The tofu will absorb the flavors beautifully while maintaining its crispy exterior.
Other Proteins: Pork, Beef, Fish
Thin pork chops or pork tenderloin cut into medallions work wonderfully with this sauce. Cook pork to 145°F internal temperature. For beef, try thin-sliced sirloin or flank steak cut against the grain – our Beef Stir Fry uses similar techniques. Fish works surprisingly well – choose firmer varieties like cod, halibut, or salmon cut into chunks. The strong sauce flavors complement rather than overpower most proteins, making this an economical way to elevate inexpensive cuts.
Gluten-Free Adaptation
Replace regular soy sauce with tamari or coconut aminos for gluten-free diets. Ensure your rice vinegar is certified gluten-free (most are, but check labels). Substitute the all-purpose flour with rice flour or cornstarch for coating the protein. All other ingredients are naturally gluten-free, making this an easy adaptation that doesn’t sacrifice flavor.
Other Flavor Twists
Add diced bell peppers or snap peas during the last minute of cooking for extra vegetables and crunch. A tablespoon of rice wine or dry sherry can add complexity to the sauce. Some cooks like to add a pinch of five-spice powder or fresh ginger for an extra aromatic dimension. For those who enjoy sweetness, a tablespoon of brown sugar can complement the honey beautifully.
What to Serve With Honey Garlic Chicken
This versatile dish pairs beautifully with a wide range of sides, from traditional Asian accompaniments to unexpected fusion combinations.
Classic Rice Pairings
White Rice remains the classic choice – its neutral flavor lets the honey garlic sauce shine while providing the perfect vehicle for soaking up every drop. Brown Rice adds nuttiness and fiber for a healthier option. Cauliflower Rice keeps the meal low-carb while still providing that satisfying base. For something special, try Coconut Rice with its subtle sweetness that complements the honey garlic flavors, or Cilantro Lime Rice for a fresh, zesty contrast that pairs beautifully – similar to what we use in our Cilantro Lime Chicken Bowl.
Delicious Vegetable Sides
Steamed Broccoli is the ultimate pairing – its mild bitterness balances the sweet sauce perfectly, and you can find more broccoli inspiration in our Chicken and Broccoli recipe. Roasted Brussels Sprouts or Roasted Carrots add caramelized notes that echo the honey in the sauce. Sautéed Snow Peas or Sugar Snap Peas provide satisfying crunch and fresh flavor. For an authentic touch, try a Sesame Cucumber Salad – the cool, crisp cucumbers provide refreshing contrast to the rich, sticky chicken, or try our Creamy Cucumber Salad for variation.
Noodle Varieties
Lo Mein Noodles or Egg Noodles turn this into a complete one-bowl meal. Rice Noodles work beautifully for gluten-free diets, while Ramen Noodles (without the seasoning packet) make an economical option that kids love. Toss cooked noodles with a bit of sesame oil and soy sauce before topping with the honey garlic chicken. For pasta lovers, you might also enjoy our One Pot Creamy Garlic Pasta or Garlic Shrimp Pasta.
Unexpected & Fun Pairings
Mac and Cheese might sound unusual, but the creamy comfort food pairs surprisingly well with the sweet and savory chicken – it’s fusion comfort food at its finest. Asian-Style Coleslaw with sesame dressing provides crunchy freshness that cuts through the rich sauce. Garlic Mashed Potatoes create an indulgent comfort food combination.
As Part of a “Homemade Chinese Banquet”
Create a full takeout-style feast by serving alongside Vegetable Fried Rice, Pork Dumplings, Sesame Green Beans, and Hot and Sour Soup. Egg Rolls or Spring Rolls add textural variety, while Szechuan-Style Eggplant provides another sauce-heavy dish for those who love bold flavors. For more bowl-style meals, explore our Greek Chicken Bowls, Street Corn Chicken Rice Bowl, or Ground Beef Burrito Bowl.
Make-Ahead, Storage & Reheating Tips (Meal Prep Friendly!)
This recipe adapts beautifully to meal prep strategies and busy lifestyles with proper storage and reheating techniques.
Refrigerating Leftovers
Store cooled honey garlic chicken in airtight containers in the refrigerator for up to 4 days. The sauce may thicken considerably when cold – this is completely normal. Separate into individual serving containers for easy grab-and-go lunches. Always let the chicken cool to room temperature before refrigerating to prevent condensation that can make the coating soggy.
Freezing Honey Garlic Chicken
For longer storage, this dish freezes well for up to 3 months. Cool completely before transferring to freezer-safe containers, leaving some headspace for expansion. Label with date and contents. Note that the texture may be slightly less tender after freezing, but the flavor remains excellent. Freeze in family-sized portions or individual servings based on your needs.
Reheating Instructions
From Refrigerated: Microwave individual portions for 1-2 minutes, stirring halfway through. For stovetop reheating, add a splash of water or chicken broth to a pan over low heat and warm gently, stirring occasionally. From Frozen: Thaw overnight in the refrigerator before reheating. For oven reheating, cover with foil and warm at 350°F for 15-20 minutes until heated through.
Smart Meal Prep Strategies
The sauce can be made up to a week ahead and stored separately in the refrigerator. Raw chicken can be cut and seasoned up to 2 days ahead. For fastest weeknight assembly, portion out pre-cut chicken, pre-made sauce, and flour coating in meal prep containers. When ready to cook, everything comes together in under 15 minutes. Consider doubling the sauce recipe and using it for other proteins throughout the week. For more meal prep inspiration, check out our Turkey Burrito Bowls or Chicken Sweet Potato Rice Bowl.
Honey Garlic Chicken Recipe
Equipment
- Large skillet or wok
- mixing bowls
- whisk
- Cutting board
- Sharp knife
- Measuring cups and spoons
- Wooden spoon or spatula
Ingredients
For the Honey Garlic Sauce:
- 1/3 cup honey
- 1/4 cup low-sodium soy sauce
- 2 tablespoons rice vinegar
- 1 tablespoon sriracha sauce
- 1 teaspoon toasted sesame oil
- 1 tablespoon cornstarch
For the Chicken:
- 2 large boneless skinless chicken breasts (about 1 pound), cut into 1-inch pieces
- 1/3 cup all-purpose flour
- 1 teaspoon salt
- 1/2 teaspoon black pepper
- 1 teaspoon garlic powder
- 2 tablespoons vegetable oil
- 2 tablespoons unsalted butter
- 4 garlic cloves minced
- 3-4 green onions sliced (for garnish)
Instructions
- Prepare the sauce: In a bowl, whisk together honey, soy sauce, rice vinegar, sriracha, sesame oil, and cornstarch until smooth. Set aside.
- Season and coat chicken: Cut chicken into uniform 1-inch pieces. Pat dry with paper towels. Season with salt, pepper, and garlic powder. Toss with flour until evenly coated.
- Cook the chicken: Heat oil in a large skillet over medium-high heat. Cook chicken in batches to avoid overcrowding, 2-3 minutes per side until golden brown and cooked through (165°F internal temperature). Remove to a plate.
- Make the sauce: Reduce heat to medium-low. Add butter to the same pan. Once melted, add minced garlic and sauté for 30-60 seconds until fragrant.
- Combine: Pour in the prepared sauce mixture, scraping up any browned bits. Simmer for 1-2 minutes until thickened and glossy.
- Finish and serve: Return chicken to the pan and toss until evenly coated. Remove from heat, garnish with green onions, and serve immediately.
Notes
- Don’t overcook the chicken – small pieces cook quickly and can become dry
- The sauce will thicken as it cools, so aim for slightly thinner than desired final consistency
- Can substitute chicken thighs for more budget-friendly and tender results
- For gluten-free version, use tamari instead of soy sauce and rice flour instead of all-purpose flour
- Sauce can be made up to 1 week ahead and stored in refrigerator
- Leftovers keep for 3-4 days refrigerated or 3 months frozen
Frequently Asked Questions (FAQs)
Yes! Boneless, skinless chicken thighs are actually preferred by many cooks for this recipe. They’re more tender, budget-friendly, and virtually impossible to overcook due to their higher fat content. They also have more flavor than breasts and pair beautifully with the rich sauce. Trim any excess fat before cutting, but some marbling adds to the final taste.
No, not typically. With the recommended 1 tablespoon of sriracha, the heat level is very mild – most people describe it as barely noticeable warmth rather than spice. The sriracha adds depth and complexity without overwhelming heat. You can easily adjust by using more or less to suit your family’s preferences, or substitute with a pinch of red pepper flakes.
Apple cider vinegar works excellently as a 1:1 substitute and actually adds nice fruity notes. White wine vinegar is another good option, though you might want to add a tiny pinch of sugar to balance the sharper acidity. In a pinch, fresh lemon juice can work, though it will change the flavor profile slightly. Avoid using regular white vinegar as it’s too harsh.
Absolutely! Replace regular soy sauce with tamari or coconut aminos, and substitute all-purpose flour with rice flour, cornstarch, or a gluten-free flour blend for coating the chicken. Most rice vinegars are naturally gluten-free, but check labels to be certain. All other ingredients are naturally gluten-free, making this an easy adaptation.
The flour coating serves multiple purposes: it creates a light, crispy crust that adds textural interest, helps the chicken develop better browning for enhanced flavor, and gives the glossy sauce something to grip onto so it coats evenly rather than sliding off. It’s not heavy breading – just enough coating to improve both texture and sauce adherence.
Yes, definitely! This versatile sauce works beautifully with shrimp (cook 1 minute per side), firm tofu (press well and coat with cornstarch), pork chops, beef strips, or even firm fish. Each protein requires slightly different cooking times, but the sauce preparation remains the same. The key is not to overcook delicate proteins like shrimp or fish.
Too dark: The heat was likely too high, causing the honey to caramelize excessively and potentially burn. Use medium to medium-low heat once you add the sauce. Too thin: The cornstarch may not have had enough time to activate. Simmer for an additional minute while stirring constantly. Too thick: Add water or chicken broth one tablespoon at a time until you reach the desired consistency.
The recipe is designed for approximately 1 pound (450g) of boneless, skinless chicken, which typically equals 2 large chicken breasts or 6-8 chicken thighs. If using significantly more or less chicken, adjust the sauce quantities proportionally to ensure every piece gets properly coated.
This Honey Garlic Chicken recipe delivers restaurant-quality results in your own kitchen with minimal effort and maximum flavor. The combination of sweet honey, savory soy sauce, and aromatic garlic creates an irresistible glaze that transforms ordinary chicken into an extraordinary meal. Whether you’re cooking for family dinner or meal prepping for the week ahead, this versatile recipe adapts to your needs while consistently delivering the perfect balance of sticky, sweet, and savory flavors that keep everyone coming back for more.