Remember the simple, golden-brown perfection of a grilled cheese sandwich? It was the ultimate comfort food, the hero of rainy afternoons and lazy weekends. But let’s be honest, it had a few flaws. The edges were often dry, the middle was sometimes a little soggy, and getting that perfect cheese pull was more a matter of luck than skill. Well, I’m here to tell you that there’s a better way. A funnier, crispier, and, dare I say, more perfect way to enjoy that cheesy goodness. I’m talking about grilled cheese roll-ups. This is the kind of genius idea that makes you wonder why you ever bothered with a flat sandwich in the first place.
I stumbled upon this idea one day when my niece was visiting. I made her a classic grilled cheese, and she just stared at it, unimpressed. Kids, right? So, on a whim, I grabbed a rolling pin and a little creativity. I flattened the bread, rolled it up with cheese inside, and cooked it like a tiny, golden log. Her eyes lit up. Not only did she devour it, but I discovered something incredible: the roll-up format makes every single bite crunchy and cheesy. It’s now our go-to for a quick lunch, a satisfying snack, and a total family favorite.
Why Grilled Cheese Roll-Ups Are a Game-Changer
Forget everything you think you know about grilled cheese. The roll-up revolution is here, and it solves all the classic sandwich’s problems.
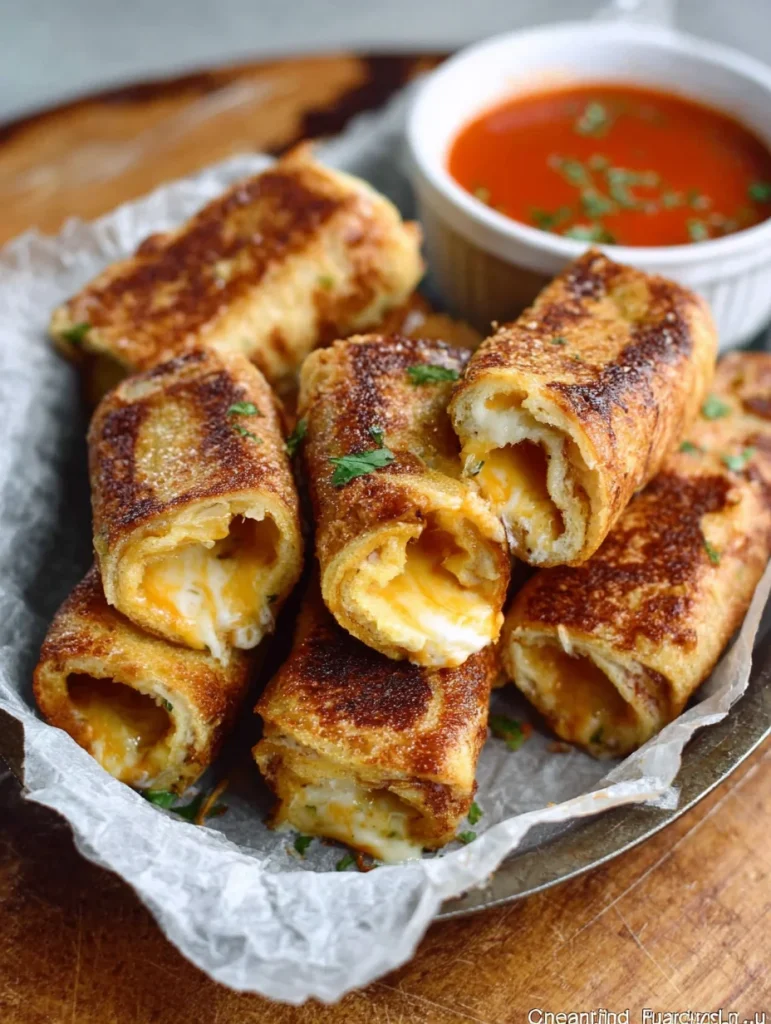
First, there’s the perfect-for-dipping shape. A regular grilled cheese is great, but it can be awkward to dunk into a bowl of tomato soup. These grilled cheese roll-ups are like little cheese-filled straws. They are literally built for dipping. They grab all the delicious soup, ketchup, or even ranch dressing you can throw at them. And because you’re cooking the entire surface of the bread, you get a beautiful, golden crust all the way around. No more pale, un-toasted edges. The entire thing is a study in crispy, buttery perfection. It’s a complete upgrade from the classic, IMO.
The Simple Ingredients You Already Have
The best part about this recipe is that it uses the same core ingredients as a regular grilled cheese. You don’t need a trip to a specialty store or a long shopping list. You probably have everything you need in your pantry right now.
- Bread: Any standard sandwich bread will work. White bread is a classic for a reason; it’s soft and easy to flatten without tearing. Just make sure the slices aren’t too thick or too thin.
- Cheese: Sliced cheese is the easiest option here. American cheese is a nostalgic favorite and melts like a dream, but I love using a good cheddar or a provolone for a sharper flavor. You could even mix a couple of cheeses for a more complex flavor.
- Butter: A good quality, softened butter is essential for that perfect golden crust. Don’t melt it in the microwave; it can get too hot and burn. Just let it sit out for a few minutes so it’s spreadable.
Let’s Get Rolling: Your Step-by-Step Guide to Success
This recipe is so simple, you’ll be making it with your eyes closed after the first try. But for now, let’s walk through the easy steps to create the ultimate grilled cheese dippers.
Step 1: Prep Your Bread
First, lay out a slice of bread on a cutting board. Grab a rolling pin and start flattening the bread. You want to press it down until it’s thin and pliable, like a pancake. Don’t worry if it looks a little weird. This is the secret to getting a tight roll.
Step 2: The Cheese Roll
Now for the cheesy part. Lay a slice of cheese on your flattened bread. It’s okay if it hangs over the edges a little. From one end, carefully roll the bread and cheese up into a tight log. Press down firmly to seal the edge. This is a crucial step! A good, tight roll prevents the cheese from leaking out when you cook it.
Step 3: The Golden Cook
Heat a large skillet or frying pan over medium heat. You don’t want it to be too hot, or your bread will burn before the cheese melts. Spread your softened butter evenly on the outside of each roll-up. Place the roll-ups in the skillet, seam-side down first.
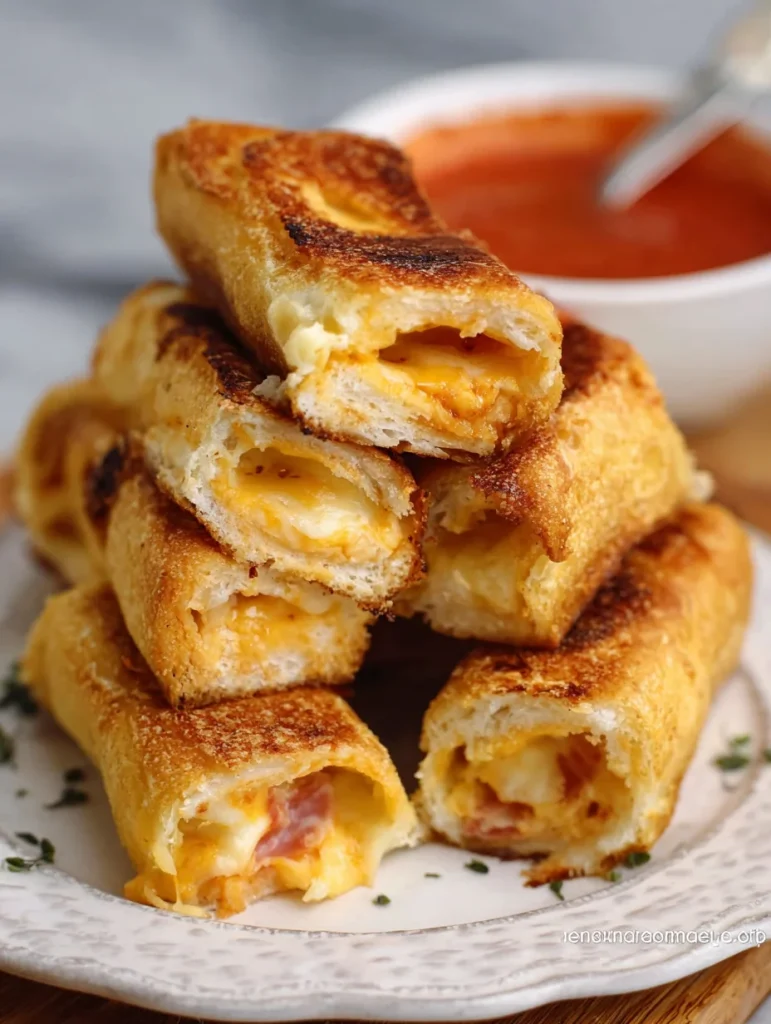
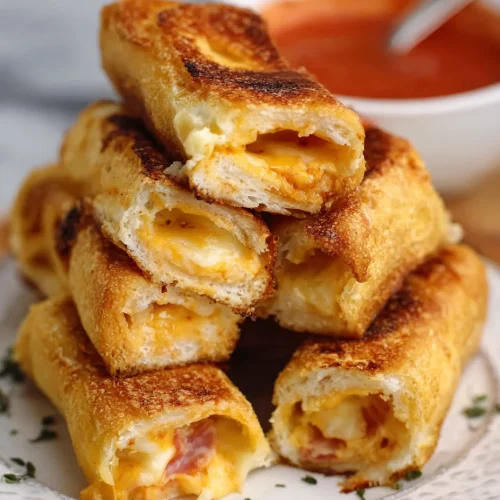
You’ll cook them for about 2-3 minutes per side, turning them gently with tongs. Your goal is a perfectly golden-brown color on all sides. The cheese inside should be gooey and melted. It’s like magic! Once they’re done, you can slice them into fun bite-sized pieces for a perfect snack.
Beyond the Basics: My Favorite Remixes
The original recipe is perfect, but once you master it, you can start getting creative. The possibilities for a grilled cheese roll-up are endless.
- Pizza Rolls: This is a fantastic option for a fun lunch. Before you roll up the bread, spread a thin layer of pizza sauce and a pinch of pepperoni over the cheese.
- Jalapeño Popper Rolls: For a spicy, adult twist, spread a little cream cheese on the bread, add the cheese, and sprinkle with a few slices of pickled jalapeño.
- Sweet Rolls: You can even turn these into a dessert! Spread a thin layer of Nutella or cinnamon sugar, add a little cream cheese, and roll it up. Cook it in butter and dust with a little powdered sugar. So good!
Troubleshooting & FAQs
This recipe is pretty simple, but a few things can go wrong. Don’t worry, I’ve got your back.
Can I use different types of bread? What about whole wheat or sourdough? You absolutely can! While classic white sandwich bread is the easiest to work with because it’s so soft, you can definitely use whole wheat or even brioche. Just make sure the bread is fresh and soft enough to flatten with a rolling pin without tearing. Sourdough might be a bit tricky due to its texture, but hey, if you’re feeling adventurous, I say go for it!
What are some of the best cheeses to use? The world is your oyster! American cheese is a classic for a reason—it melts like a dream and gives you that perfect gooey factor. But I love using shredded cheddar for a sharper flavor or provolone for a fantastic, stringy cheese pull. You can even mix a couple of cheeses together for a unique blend. The only rule is that it has to be a good melting cheese.
Can I make these in an air fryer? Yes, and they turn out great! Just lightly butter the outside of your roll-ups and place them in the air fryer basket in a single layer. Cook them at about 375°F (190°C) for 5-7 minutes, flipping halfway through. You’ll get that same crispy, golden exterior without a pan. It’s a fantastic, low-mess option.
What are some good dipping sauces besides tomato soup? This is the most fun part! While tomato soup is the OG, there are so many other options. I love dipping them in a simple marinara sauce, or for a tangy kick, try ranch dressing. My personal favorite, though? A little sriracha mayo for a spicy kick. Don’t be afraid to experiment with your favorite condiments!
How should I store and reheat leftovers? These are definitely best when fresh, but you can store leftovers in an airtight container in the fridge for a day or two. To reheat them, I don’t recommend a microwave, as it will make them soggy. Instead, pop them back in a skillet over low heat or in your air fryer for a few minutes until they are warm and crispy again. They’ll taste almost as good as the first time!
So there you have it. A guide to making the most delicious, fun, and kid-friendly twist on a classic comfort food. It’s a simple, brilliant idea that solves all the problems of a regular grilled cheese. The next time you’re craving something warm and cheesy, you’ll know exactly what to make. Go forth and roll! You’ve got this.
Grilled Cheese Roll-Ups
Equipment
- Rolling Pin
- Cutting board
- skillet or frying pan
- Tongs
- spatula
Ingredients
- 8 slices sandwich bread
- 8 slices cheese (American, cheddar, provolone, or mix)
- 3 tbsp softened butter
Instructions
- Lay out bread slices on a cutting board. Flatten each slice with a rolling pin until thin and pliable.
- Place one slice of cheese on each piece of flattened bread. Roll tightly into a log, pressing the seam to seal.
- Heat a skillet over medium heat. Spread butter on the outside of each roll-up and place seam-side down in skillet.
- Cook 2–3 minutes per side, turning with tongs, until golden brown all over and cheese is melted.
- Serve warm with tomato soup, ketchup, or dipping sauce of choice. Slice into bite-sized pieces if desired.
Notes
💡 Tip: Roll tightly to avoid cheese leaks, and cook over medium heat so the bread toasts evenly while the cheese melts inside.