Why You’ll Love These Crunchy Zucchini Chips
Craving something crispy and satisfying but want to stick to your healthy eating plan? These crunchy baked zucchini chips are your perfect solution! Unlike traditional potato chips loaded with unhealthy fats and empty calories, these homemade gems deliver all the satisfying crunch you crave while keeping your diet goals on track.
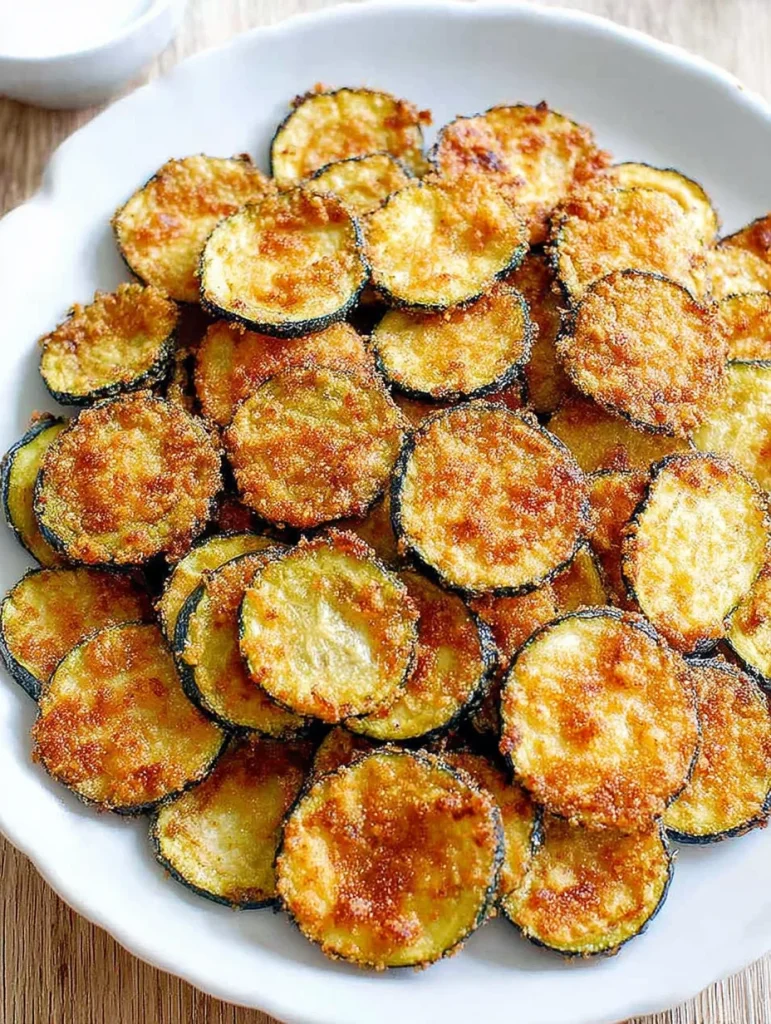
Table of contents
- Why You’ll Love These Crunchy Zucchini Chips
- Essential Ingredients for Perfect Zucchini Chips
- Step-by-Step Guide: How to Make Crunchy Zucchini Chips
- Pro Tips & Tricks for the Crispiest Zucchini Chips
- Customizing Your Zucchini Chips: Flavor Variations & Dietary Notes
- Serving Suggestions for Your Crunchy Zucchini Chips
- Storage and Reheating Tips
- Frequently Asked Questions (FAQ)
A Healthy Alternative Zucchini chips offer a nutrient-packed, low-calorie alternative to processed snacks. Each serving provides essential vitamins and minerals while being naturally low in carbs and calories. It’s the ultimate guilt-free snack that doesn’t compromise on flavor or that satisfying crunch we all love during snack time.
Satisfying Crunch & Flavor Don’t let the vegetable base fool you – these chips deliver serious crunch factor! When prepared correctly, they rival any store-bought chip in texture while offering a deliciously savory flavor that tackles those munchy cravings head-on.
Diet-Friendly Versatility Whether you’re following a paleo-friendly, gluten-free, vegan, low-carb, keto, or Mediterranean clean eating regimen, these wholesome chips fit seamlessly into virtually any healthy eating plan. They’re made from fresh vegetables and simple ingredients you probably already have in your kitchen.
Essential Ingredients for Perfect Zucchini Chips
The beauty of zucchini chips lies in their simplicity, but choosing the right ingredients makes all the difference between soggy disappointment and crispy perfection.
Zucchini Selection Choose medium to large, firm zucchini for the best results. Interestingly, those “grandma’s garden-sized” larger zucchini often work exceptionally well because they tend to be drier, which is exactly what we want for maximum crispiness. Look for fresh produce with smooth skin and no soft spots.
Base Ingredients:
- Zucchinis: 2-3 medium zucchini, sliced evenly to 1/8 inch thick
- Olive Oil: 2-3 tablespoons or your preferred cooking oil
- Salt: 1-2 teaspoons kosher salt or crunchy sea salt
Crispy Coatings (Optional but Recommended): For extra crunchiness and rich, nutty, savory flavor, consider these coating options:
- Panko Breadcrumbs: 1/2 cup for superior texture
- Almond Flour: 1/4 cup for nutty flavor and gluten-free option
- Parmesan Cheese: 1/2 cup finely grated for savory punch
- Egg Wash: 1 beaten egg (or vegan alternative using ground flaxseed mixed with nut milk)
Optional Flavor Boosters: Transform your chips with these seasoning blends: hot smoked paprika, cumin, garlic powder, onion powder, cayenne pepper, or everything bagel seasoning. Each brings a unique flavor profile to your homemade snack.
Step-by-Step Guide: How to Make Crunchy Zucchini Chips
Preparing Your Zucchini for Maximum Crispiness
Slicing The key to uniform cooking lies in consistent slicing. Use a mandolin slicer for perfect 1/8-inch thick rounds, or carefully use a sharp chef’s knife if slicing by hand. Uniformity is absolutely crucial – uneven slices will result in some chips burning while others remain soggy.
Moisture Removal – Two Key Methods This step is non-negotiable for crispy results! Choose one of these proven methods:
Pressing Method: Lay zucchini slices on paper towels, cover with additional paper towels, and press with a baking sheet for 15-20 minutes. Apply gentle pressure to squeeze out excess moisture without breaking the slices.
Salting Method: Sprinkle slices generously with salt and place in a colander for 10-30 minutes. This draws out water naturally. After the time is up, rinse thoroughly under cold water and blot completely dry with paper towels. This method is crucial for non-breaded chips.
Coating and Seasoning Your Chips
Preheat Oven You have two excellent temperature options:
- High Heat Method (425°F): Recommended for coated chips – delivers quicker, robust crispiness
- Low Heat Method (235°F): Takes longer but works well for simple seasoned chips
Prepare Baking Sheets Line baking sheets with parchment paper or Silpat mats. For optimal results, place a wire rack over your baking sheet – this allows air to circulate around the chips and prevents them from sitting in any released moisture. Lightly brush or spray the rack with olive oil to prevent sticking.
Coating Process (if applicable) If using the breaded method, set up a simple breading station: egg wash in one shallow dish, breadcrumb mixture (panko + Parmesan + seasonings) in another. Dip each zucchini slice in egg wash, then coat evenly with the breadcrumb mixture. Use the “wet hand, dry hand” technique to keep your fingers from getting coated too!
Arrange & Season Place slices in a single layer with space between each piece – crowding leads to steaming instead of crisping. If not using coating, lightly brush tops with olive oil and sprinkle with your chosen seasonings.
Baking for Golden Perfection
Bake Time and Monitoring
- High Heat (425°F): Bake for 17-20 minutes, flipping halfway through. Some recipes suggest 15 minutes, adding seasonings, then 15-20 more minutes.
- Low Heat (235°F): Bake for 1.5-2 hours, checking periodically.
The Key to Success: Watch carefully! Oven temperatures vary significantly, so constant monitoring during the final minutes prevents burning. Remove chips that achieve golden-brown perfection while returning any flimsy or damp pieces for additional baking time.
Cooling Transfer finished chips to paper towels immediately to absorb any excess oil. They’ll continue crisping slightly as they cool.
Pro Tips & Tricks for the Crispiest Zucchini Chips
Choose Wisely: Larger, more mature zucchini often contain less water, making them naturally better candidates for crispy chips.
Precision Slicing: A mandolin slicer isn’t just convenient – it’s your secret weapon for consistent thickness and even cooking. Inconsistent slices = inconsistent results.
Thorough Moisture Removal: This cannot be overstated. Zucchini naturally contains lots of water, and every drop left behind is the enemy of crispiness. Take time with the pressing or salting method.
Single Layer is Sacred: Never overlap or crowd your chips. They need space for proper air circulation and browning. Use multiple baking sheets if necessary – your patience will be rewarded with superior crunch.
Flip for Evenness: Halfway through baking, carefully flip each chip to ensure both sides achieve that beautiful golden-brown color we’re after.
Wire Rack Advantage: Elevating chips on a wire rack allows air to circulate completely around them, preventing the dreaded soggy bottom syndrome.
Don’t Skip the Oil: Even a light drizzle of olive oil is essential for achieving that golden-brown color and satisfying crunch, especially for non-breaded versions.
Customizing Your Zucchini Chips: Flavor Variations & Dietary Notes
Savory Options
- Classic: Salt, pepper, garlic powder, and onion powder
- Ranch seasoning for that familiar tangy flavor
- Italian seasoning blend for herb-forward taste
- Parmesan cheese adds incredible savory depth
Spicy Kick Add cayenne pepper gradually – start with a pinch and build up to your heat preference.
Unique Flavors Everything bagel seasoning transforms these chips into an addictive snack that tastes like your favorite morning bagel.
Sweet Surprise For a dessert-like treat, try cinnamon sugar zucchini chips. They’re unexpectedly delightful and satisfy sweet cravings naturally.
Special Dietary Accommodations:
- Gluten-Free: Use certified gluten-free breadcrumbs or skip breading entirely
- Keto-Friendly: Replace breadcrumbs with extra Parmesan cheese for low-carb perfection
- Vegan/Dairy-Free: Substitute nutritional yeast for Parmesan and use flaxseed-nut milk mixture instead of egg wash
Serving Suggestions for Your Crunchy Zucchini Chips
Standalone Snack These chips are absolutely perfect on their own – crunchy, flavorful, and completely satisfying for mindless munching or deliberate healthy snacking.
Dipping Delights Elevate your chip experience with these pairing ideas:
- Creamy options: Whipped cottage cheese dip, tzatziki, Greek yogurt ranch, cashew cream
- Bold flavors: Romesco sauce, pesto (regular or vegan), salsa, guacamole
- Classic choices: Marinara sauce, blue cheese dressing, sour cream dip
- Keto-friendly: Cheese sauce or cream cheese dip
Perfect for pairing with other healthy snacks like peanut butter protein balls or blueberry cheesecake protein bites for a complete snack spread.
Perfect Side Dish Replace traditional fries or potato chips alongside black bean quinoa burgers, honey garlic chicken, or spicy shrimp tacos. They complement both plant-based and traditional meals beautifully.
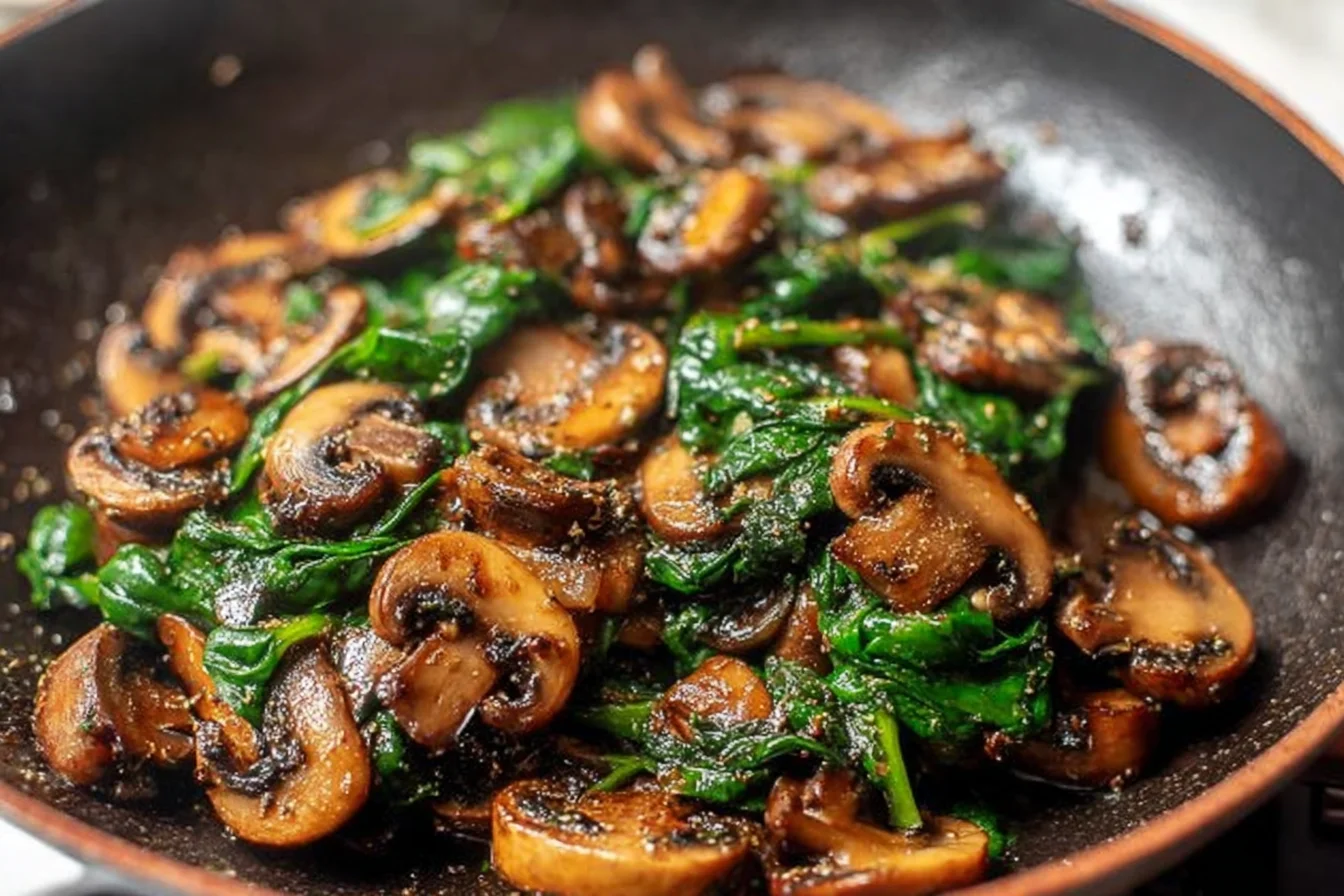
Appetizer Star Arrange on a platter with various dips for an impressive, healthy appetizer that guests will actually enjoy. Try pairing with creamy cucumber salad or serve alongside other veggie dishes like crispy baked parmesan zucchini and sautéed spinach and mushrooms for a complete healthy spread.
Storage and Reheating Tips
Best When Fresh Let’s be honest – these chips are absolutely best right after they come out of the oven when they’re at peak crispiness. They naturally soften as they cool, which is completely normal.
Storage Solutions Store cooled chips in an airtight container or zip-lock bag. They’ll maintain decent quality for 2-3 days, though they’re unlikely to last that long once people discover them!
Regaining Crispiness Lost some crunch? No problem! Spread chips on a baking sheet and re-bake uncovered in a 350°F oven for about 10 minutes. This refreshes their texture beautifully and brings back much of that original crispiness.
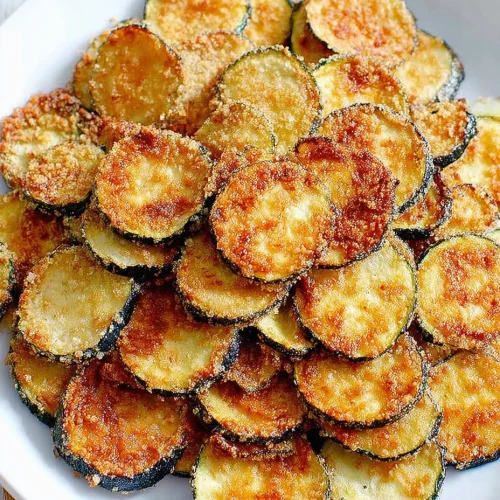
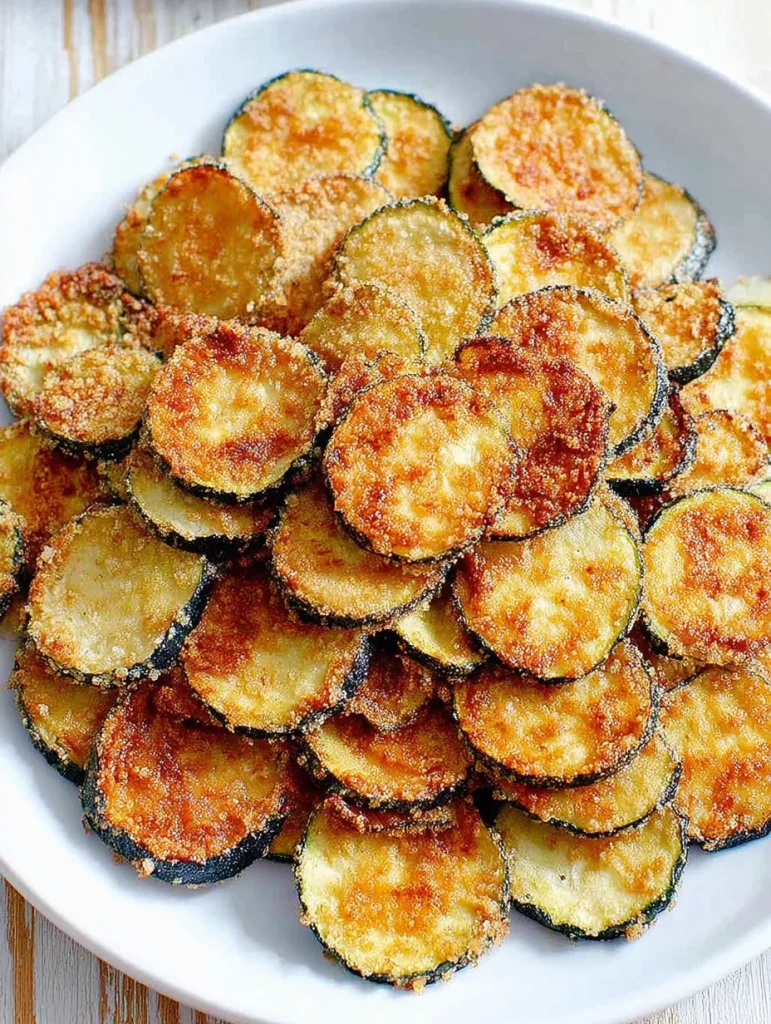
Crunchy Baked Zucchini Chips
Equipment
- Mandoline slicer or sharp knife
- 2 large baking sheets
- Wire racks (optional but recommended)
- Parchment paper or Silpat mats
- Paper towels
- Shallow bowls (for coating)
Ingredients
- 2-3 medium zucchini about 1.5 lbs
- 2-3 tablespoons olive oil
- 1-2 teaspoons kosher salt or sea salt
- 1/2 cup panko breadcrumbs optional, for coating
- 1/4 cup almond flour optional, for coating
- 1/2 cup finely grated Parmesan cheese optional, for coating
- 1 large egg beaten (optional, for coating)
- 1/2 teaspoon garlic powder
- 1/2 teaspoon onion powder
- 1/4 teaspoon smoked paprika
- 1/4 teaspoon black pepper
- Pinch of cayenne pepper optional
Instructions
- Preheat oven to 425°F (220°C). Line 2 large baking sheets with parchment paper or place wire racks on top of baking sheets.
- Prepare zucchini: Wash and slice zucchini into 1/8-inch thick rounds using a mandoline slicer or sharp knife for uniform thickness.
- Remove moisture: Lay zucchini slices on paper towels, cover with more paper towels, and press gently with a baking sheet for 15-20 minutes. OR sprinkle with salt, place in colander for 10-30 minutes, then rinse and pat completely dry.
- Prepare coating (if using): In a shallow bowl, mix panko breadcrumbs, almond flour, Parmesan cheese, garlic powder, onion powder, paprika, and black pepper. Beat egg in another shallow bowl.
- Coat zucchini: If using coating, dip each slice in beaten egg, then coat with breadcrumb mixture. If not coating, brush slices lightly with olive oil and season with salt and desired spices.
- Arrange on baking sheets: Place zucchini slices in single layer with space between each piece. Don’t overcrowd.
- Bake: For 17-20 minutes, flipping halfway through, until golden brown and crispy. Remove chips that are done and return any that need more time.
- Cool: Transfer to paper towels to absorb excess oil. Serve immediately for best crispiness.
Notes
- For maximum crispiness, ensure zucchini slices are completely dry before baking
- Use a wire rack over baking sheet for optimal air circulation
- Larger, more mature zucchini often work better as they contain less water
- Chips are best served immediately but can be stored in airtight container for 2-3 days
- To re-crisp stored chips, bake at 350°F for 8-10 minutes
- Air Fryer Option: Cook at 375°F for 10-15 minutes, shaking basket every 5 minutes
- Low Temperature Option: Bake at 235°F for 1.5-2 hours for extra crispy results
- For vegan version: Replace egg with flaxseed-nut milk mixture and use nutritional yeast instead of Parmesan
- For keto version: Skip breadcrumbs and use extra Parmesan cheese
Frequently Asked Questions (FAQ)
The secret lies in combining thin, uniform slicing, thorough moisture removal, single-layer arrangement, correct oven temperature, flipping halfway through, and optionally using a wire rack for optimal air circulation.
Absolutely! They’re naturally low-calorie, nutrient-dense, and can be made gluten-free, vegan, paleo-friendly, and keto-compatible. They’re a guilt-free alternative to processed snacks.
Soggy chips typically result from inadequate moisture removal, slices cut too thick, overcrowding the baking sheet, or not using a wire rack. Focus on these key areas for crispier results.
Two methods work well: 425°F for 17-20 minutes (recommended for coated chips) or 235°F for 1.5-2 hours (better for simple seasoned chips). The higher temperature method is generally preferred for superior crispiness.
Store in an airtight container for 2-3 days. They’ll lose some crispiness over time but can be refreshed by re-baking at 350°F for 10 minutes.
Yes! Use similar preparation methods but adjust to air fryer settings: typically 375°F for 10-15 minutes, shaking the basket every 5 minutes for even cooking. For more air fryer zucchini ideas, check out our air fryer zucchini slices recipe.
Popular options include salt and pepper, garlic powder, onion powder, paprika, cumin, cayenne, ranch seasoning, Italian herbs, everything bagel seasoning, or even cinnamon sugar for a sweet variation.
Absolutely! Use nutritional yeast instead of Parmesan, flaxseed-nut milk mixture instead of egg wash, and certified gluten-free breadcrumbs or skip breading entirely for gluten-free versions.
Related Healthy Recipes You’ll Love
Looking for more healthy snacks and zucchini recipes? Check out these popular options:
More Healthy Snacks:
- Rice Krispies Energy Balls – Perfect grab-and-go energy boost
- Peanut Butter Protein Cookies – Satisfy sweet cravings healthily
- No-Bake Cookie Dough Bars – Indulgent yet nutritious treat
Other Zucchini Recipes:
- Healthy Broccoli Pasta – Incorporate more veggies into dinner
- One-Pan Creamy Tomato Pasta – Easy weeknight meal
Refreshing Beverages:
- Lemon Ginger Water – Hydrating and detoxifying
- Green Goddess Smoothie – Nutrient-packed breakfast option
Ready to make your own batch of irresistibly crunchy zucchini chips? With these detailed techniques and pro tips, you’re equipped to create the perfect healthy snack that satisfies cravings without compromising your wellness goals. Your taste buds (and waistline) will thank you!