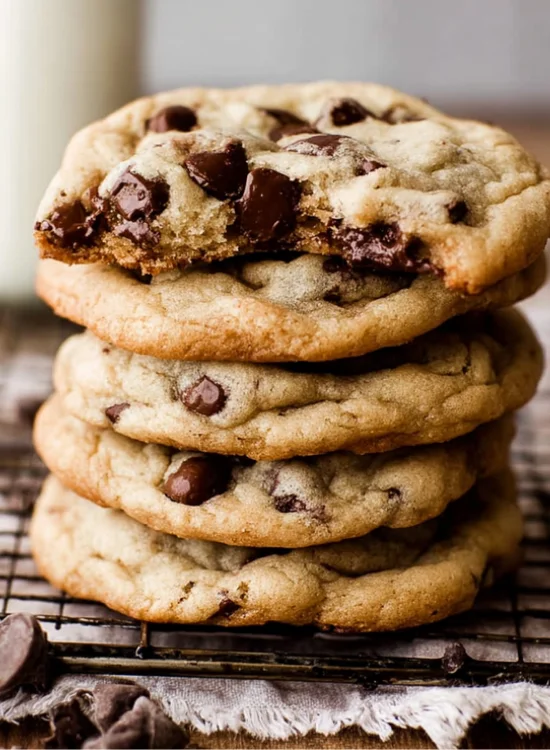
This chocolate chip cookie recipe creates the perfect combination of crispy edges, soft centers, and melted chocolate in every bite. After testing countless variations and analyzing what makes the most beloved recipes so successful, I’m sharing the ultimate chocolate chip cookie recipe that delivers bakery-quality results every single time.
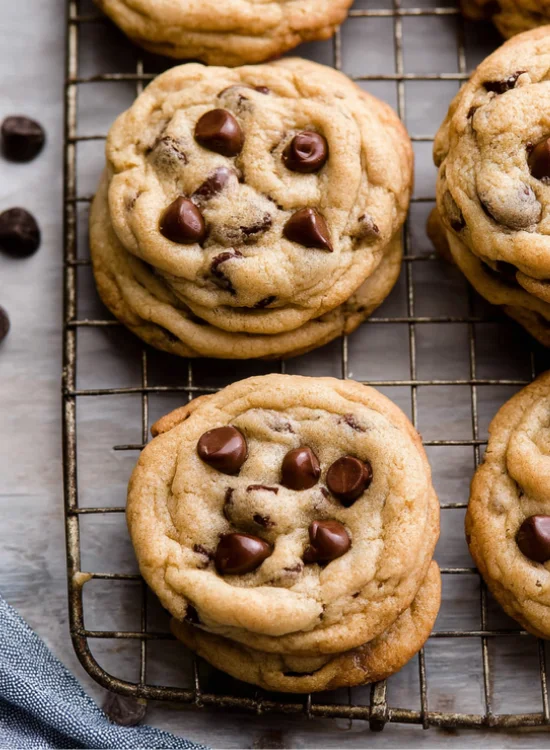
Table of contents
Why This Is Truly the BEST Chocolate Chip Cookie Recipe
What sets this recipe apart isn’t just one secret ingredient or technique – it’s the careful combination of scientifically-backed methods that work together to create cookie perfection. Unlike many recipes that promise big results but fall short, this one delivers on three critical fronts: consistently soft and chewy texture, impressive bakery-style appearance, and foolproof results even for beginner bakers.
The key differentiators that make this recipe exceptional include the strategic use of melted butter for chewiness, a higher ratio of brown sugar for moisture retention, cornstarch for ultra-soft texture, and an extra egg yolk for richness. But the real magic happens in the technique – from proper dough chilling to knowing exactly when to pull cookies from the oven.
The Secret to Unrivaled Softness and Chewiness
The foundation of incredibly soft, chewy cookies lies in understanding how each ingredient affects texture. Most recipes fail because they don’t optimize this crucial balance. Here’s how this recipe achieves cookie perfection:
Key Ingredients for Perfect Texture
Melted Butter vs. Softened Butter: While many recipes call for softened butter, using melted butter creates a denser, chewier texture. The melted butter doesn’t incorporate as much air during mixing, resulting in cookies that spread less and maintain their tender interior. To prevent greasiness, we balance this with the right flour ratio.
Brown Sugar to White Sugar Ratio: This recipe uses more brown sugar than white sugar (a 2:1 ratio). Brown sugar contains molasses, which adds moisture and creates that coveted chewy texture. The hygroscopic properties of brown sugar mean your cookies will stay soft longer after baking.
The Role of Cornstarch: Adding just 2 teaspoons of cornstarch creates an “ultra soft” consistency by absorbing excess moisture and helping maintain cookie thickness. This ingredient is often overlooked but makes a remarkable difference in the final texture.
The Power of an Extra Egg Yolk: Beyond the standard egg, adding one extra egg yolk increases fat content and lecithin, which acts as an emulsifier. This creates richer, more tender cookies while helping bind the dough for optimal chewiness.
Essential Techniques for Bakery-Style Cookies
The Importance of Chilling Dough: Chilling your dough for at least 30 minutes (preferably 2 hours) serves multiple purposes. Cold dough spreads less in the oven, resulting in thicker cookies. The chilling time also allows flour to fully hydrate and flavors to meld together, deepening the cookie’s taste profile and creating more complex, developed flavors.
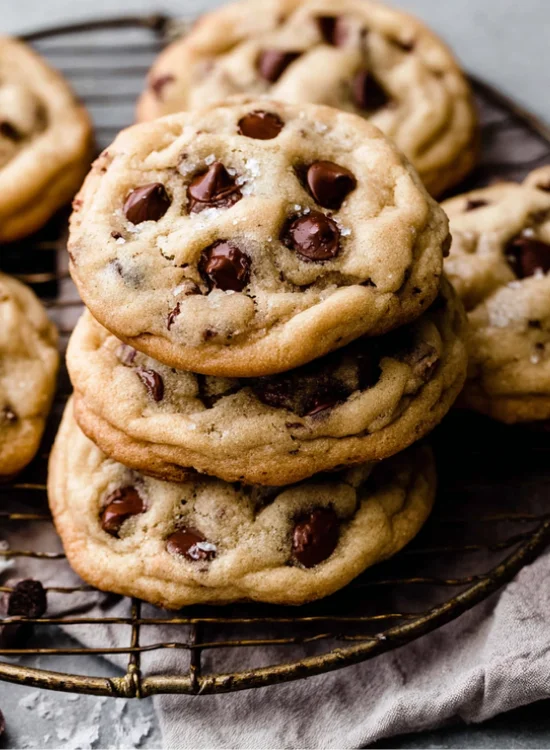
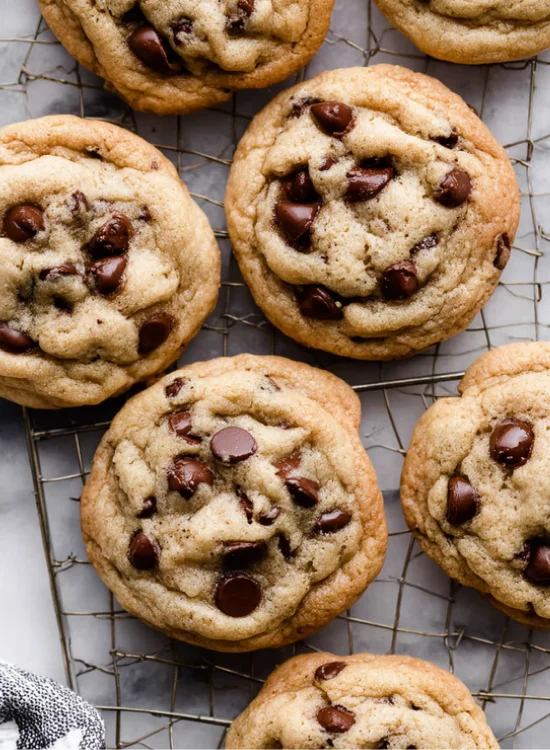
Shaping Cookies for Thickness: Instead of flattening dough balls, roll them into “extra tall” or “lumpy column” shapes. This technique creates those coveted bakery-style thick cookies with beautifully textured, slightly irregular tops that bake up with perfect contrast between crispy edges and soft centers.
Do NOT Over-Bake!: This is perhaps the most critical technique. Remove cookies when they look “a little doughy” or “just barely done” in the center. They’ll continue cooking on the hot pan for 2-3 minutes after removal, reaching perfect doneness without becoming tough or dry.
Preparing for Success: Essential Pre-Baking Checks
Before diving into the recipe, taking a few minutes to test your key ingredients can prevent the most common cookie failures. These simple tests ensure your cookies will turn out perfectly every time.
How to Test Your Leavening Agents for Freshness
Testing Baking Soda: Combine 1/2 cup hot water, 1/4 teaspoon vinegar, and 1/4 teaspoon baking soda in a small bowl. Fresh baking soda should fizz immediately and vigorously. If there’s little to no reaction, your baking soda has lost potency and should be replaced.
Testing Baking Powder: Add 1/2 teaspoon baking powder to 1/2 cup hot water. It should bubble immediately and continue bubbling. Weak or no bubbling indicates expired baking powder that will result in flat, dense cookies.
These quick tests take less than two minutes but can save you from cookie disappointment and wasted ingredients.
The Complete Recipe
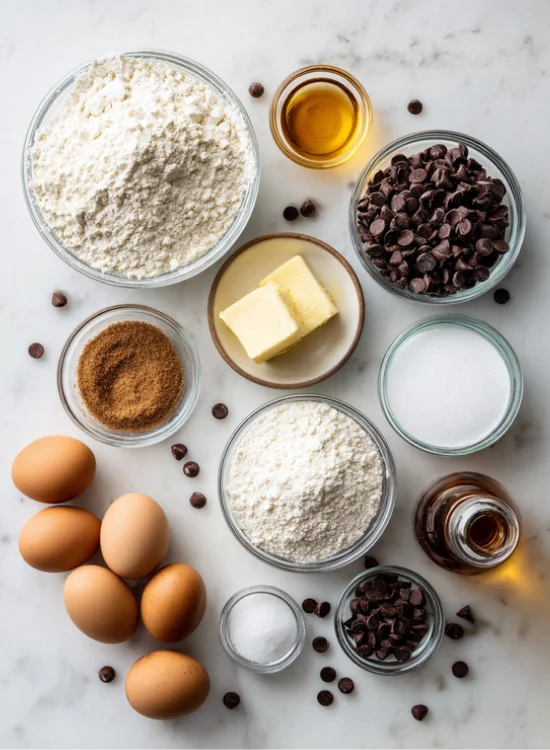
Ingredients:
- 2 1/4 cups all-purpose flour (measured correctly by weight: 281g)
- 2 teaspoons cornstarch
- 1 teaspoon baking soda
- 1 teaspoon salt
- 3/4 cup unsalted butter, melted and slightly cooled
- 1 cup packed brown sugar
- 1/2 cup granulated white sugar
- 1 large egg plus 1 egg yolk, room temperature
- 2 teaspoons vanilla extract
- 1 1/4 cups chocolate chips (semi-sweet or milk chocolate)
Step-by-Step Guide to Baking Your Best Batch
Preparing Your Dough for Success
Accurate Measuring (Especially Flour): Proper flour measurement is crucial for cookie success. Too much flour creates tough, dry cookies; too little causes excessive spreading. If possible, weigh your flour (281g for 2 1/4 cups). If using measuring cups, spoon flour lightly into the cup and level with a knife – never pack or scoop directly.
Mixing Method: In a large bowl, whisk together flour, cornstarch, baking soda, and salt. In a separate bowl, combine melted butter with both sugars, mixing until smooth. Add the whole egg, egg yolk, and vanilla, whisking until well combined. Gradually mix dry ingredients into wet ingredients until just combined – avoid overmixing. The dough should be very soft, thick, and shiny, but not greasy. Refer to accompanying photos for the ideal texture if available.
Incorporating Chocolate Chips: Fold in chocolate chips gently with a wooden spoon or rubber spatula, ensuring even distribution throughout the dough without overworking it.
Baking and Cooling for Optimal Results
Oven Temperature and Monitoring: Preheat your oven to 350°F (175°C) and use an oven thermometer to verify accuracy. Even small temperature variations can significantly impact cookie texture and spread.
Shaping and Baking: After chilling dough, roll into balls slightly larger than a golf ball. Instead of perfect spheres, shape them into “lumpy columns” – your cookie dough should look less like balls and more like, well, lumpy columns with irregular surfaces. A video tutorial, if available, would further demonstrate this technique. Place on parchment-lined baking sheets, leaving 2 inches between cookies. Bake for 11-13 minutes until edges are just set and centers look slightly underbaked.
Cooling Process: Allow cookies to cool on the baking sheet for 5 minutes before transferring to a wire rack. This cooling time on the warm pan completes the cooking process and prevents cookies from falling apart during transfer, contributing to their soft, chewy center. The residual heat ensures perfect texture development.
Troubleshooting Common Chocolate Chip Cookie Problems
Even with a perfect recipe, small variables can affect results. Here’s how to diagnose and fix the most common issues:
Why Your Cookies Might Not Be Perfect (and How to Fix It!)
Cookies Spreading Too Much / Too Flat
Causes: Expired baking soda, over-mixing dough, warm ingredients or insufficiently chilled dough, or oven temperature running cool.
Solutions: Test baking soda freshness by adding a pinch to vinegar (it should fizz vigorously) and replace if needed. Mix dough just until ingredients are combined – overmixing develops gluten and creates tough cookies. Ensure butter has cooled after melting and chill dough adequately. Verify oven temperature with a thermometer and adjust accordingly. Pro tip from experienced bakers: If your oven runs hot, try reducing temperature by 25°F rather than shortening bake time.
Cookies Not Flattening / Too Puffy
Causes: Dough too cold, excess flour (common when measuring by cups), or oven running hot.
Solutions: Let chilled dough sit at room temperature for 5-10 minutes before baking. Double-check flour measurement – weigh if possible. Verify oven temperature and reduce by 25°F if necessary. You can also gently flatten dough balls slightly before baking.
Chocolate Chip Cookie Recipe
Equipment
- Large mixing bowls
- Electric mixer or whisk
- Measuring cups and spoons
- Kitchen scale (recommended)
- Baking sheets
- Parchment paper
- Wire cooling racks
- Oven thermometer (recommended)
Ingredients
- 2 1/4 cups 281g all-purpose flour
- 2 teaspoons cornstarch
- 1 teaspoon baking soda
- 1 teaspoon salt
- 3/4 cup 170g unsalted butter, melted and slightly cooled
- 1 cup 213g packed brown sugar
- 1/2 cup 99g granulated white sugar
- 1 large egg room temperature
- 1 large egg yolk room temperature
- 2 teaspoons vanilla extract
- 1 1/4 cups 213g chocolate chips (semi-sweet or milk chocolate)
Instructions
- Test leavening agents: Combine 1/2 cup hot water, 1/4 teaspoon vinegar, and 1/4 teaspoon baking soda. Fresh baking soda should fizz vigorously. Replace if needed.
- Mix dry ingredients: In a large bowl, whisk together flour, cornstarch, baking soda, and salt. Set aside.
- Combine wet ingredients: In a separate bowl, mix melted butter with brown sugar and white sugar until smooth. Add whole egg, egg yolk, and vanilla extract, whisking until well combined.
- Combine wet and dry: Gradually mix dry ingredients into wet ingredients until just combined. Avoid overmixing. Dough should be very soft, thick, and shiny.
- Add chocolate chips: Fold in chocolate chips gently with a wooden spoon until evenly distributed.
- Chill dough: Cover and refrigerate for at least 30 minutes, preferably 2 hours or overnight.
- Preheat oven: Heat oven to 350°F (175°C). Line baking sheets with parchment paper.
- Shape cookies: Roll chilled dough into balls slightly larger than golf balls. Shape into “lumpy columns” rather than perfect spheres for textured tops.
- Bake: Place cookies 2 inches apart on prepared baking sheets. Bake for 11-13 minutes until edges are just set and centers look slightly underbaked.
- Cool: Let cookies cool on baking sheet for 5 minutes before transferring to wire racks.
Notes
- For best results, weigh flour (281g) rather than using measuring cups
- Don’t overbake – cookies should look slightly doughy in centers when removed
- Dough can be frozen for up to 3 months; bake from frozen adding 1-2 extra minutes
- Store in airtight container at room temperature for up to 1 week
- For high altitude (3,000+ ft): increase oven temperature to 375°F and reduce baking time by 2-3 minutes
Frequently Asked Questions (FAQs) About Chocolate Chip Cookies
The secret to gooey centers is timing. Remove cookies from the oven when they still look “a little doughy” in the center – they should appear just barely set around edges. The residual heat from the pan will continue cooking them perfectly without overdoing the centers.
Absolutely! This is actually a fantastic time-saving strategy. Roll dough into balls, place on a baking sheet, and freeze until solid (about 2 hours). Transfer frozen dough balls to an airtight container or freezer bag. They’ll keep for up to 3 months. Bake directly from frozen, adding 1-2 extra minutes to baking time.
Yes! Place frozen dough balls on parchment-lined baking sheets and bake at 350°F for 13-15 minutes. The slightly longer baking time ensures they cook through evenly while maintaining that perfect texture.
Many readers have reported excellent results at elevations above 3,000 feet. For high altitude baking, try increasing oven temperature to 375°F and reducing baking time by 2-3 minutes. The lower air pressure can cause cookies to spread more, so you might also reduce baking soda slightly (to 3/4 teaspoon). Some bakers at 4,500-7,000 feet successfully use 350°F for 12-15 minutes, adapting based on their specific oven and conditions.
Definitely! This recipe is wonderfully adaptable. Keep the total add-ins around 1 to 1 1/4 cups, but feel free to use chocolate chunks, dark chocolate chips, white chocolate, M&Ms, or chopped nuts like walnuts or pecans. If adding nuts, consider reducing chocolate chips slightly to maintain balance. For those looking for healthier alternatives, you might enjoy our protein chocolate brownie recipe or chocolate avocado mousse for guilt-free chocolate indulgence.
While substitutions can work, they’ll affect texture and results. For salted butter, use the same amount but reduce added salt to 1/2 teaspoon. As some home bakers suggest, you may want to taste the dough to ensure it’s salted to your liking. Sugar can be reduced by up to 1/4 cup total, though cookies may be less chewy and won’t stay soft as long. For major changes like egg-free or gluten-free modifications, dedicated recipes are often recommended for optimal results rather than substitutions. If you’re looking for healthier protein-packed alternatives, check out our peanut butter protein cookies or banana protein muffins. Avoid substituting oil for butter, as this dramatically changes texture and flavor, typically resulting in greasier, less structured cookies.
When stored in an airtight container at room temperature, these cookies maintain their soft texture for up to one week. For longer storage, refrigerate for up to 2 weeks or freeze baked cookies for up to 3 months. To refresh day-old cookies, microwave for 8-10 seconds to restore that just-baked softness.
Final Tips for Cookie Success
Remember that baking is both art and science. While this recipe provides a foolproof foundation, small adjustments based on your preferences and environment can help you achieve your personal cookie perfection. Keep notes about what works best in your kitchen, and don’t be afraid to experiment with mix-ins and minor technique variations.
The most important lesson? Trust the process, especially when it comes to not over-baking. Those slightly underdone-looking centers will transform into perfectly gooey, soft cookies that rival any bakery.
For those interested in healthier treat alternatives, explore our collection of nutritious desserts including blueberry cheesecake protein bites, rice krispies energy balls, and protein tiramisu cups. And if you’re looking to balance indulgent treats with healthy habits, check out our green goddess smoothie for a nutritious start to your day.
Happy baking!